A pen plotter is the most honest machine in hobby CNC. There is no spindle noise to hide behind, no hot end, no filament to blame. There is a pen, two axes, and one question: can the machine put the tip back down in the same spot twice? Plenty of builds answer yes while running on nothing more exotic than an Arduino Uno and two stepper motors — which is a genuinely surprising amount of machine for well under a hundred dollars of electronics.
The pattern is well-trodden. Dejan Nedelkovski’s plotter over at HowToMechatronics runs a 360×280 mm drawing area on MGN15H linear rails and GT2 belts, with an Arduino Uno and a CNC Shield doing all the thinking. At the other end of the ambition scale, a swarm of A4-sized community builds use the same Uno-plus-shield brain bolted to 2020 and 2040 aluminum extrusion with POM wheels. Same electronics, wildly different frames. That is the appeal: the hard part is solved and shared, and your build quality decides the output.
Two steppers draw the picture. A three-dollar servo is the hard part.
X and Y are the easy axes. Each is a stepper motor turning a toothed pulley against a belt, and a stepper is an open-loop motor that moves a fixed fraction of a turn per electrical pulse — no feedback, just trust. (If the distinction between that and a servo is fuzzy, our rundown of servos, DC motors and steppers covers it.)
Z is different, and this is where first-time builders lose a weekend. A plotter does not need a Z axis in any real sense — it needs the pen up or the pen down, roughly five millimeters apart. A hobby servo does that for a couple of dollars. The problem is that GRBL, the firmware almost every one of these machines runs, has no concept of a pen. It has a concept of a spindle, and it controls spindle speed by emitting PWM on Arduino digital pin 11.
PWM means pulse-width modulation: a square wave switching on and off fast, where the fraction of time spent high encodes a value (there is a fuller explanation in our PWM guide). A hobby servo also listens to pulse widths — but it expects them at roughly 50 Hz, and GRBL’s spindle output runs far faster than that. Nedelkovski puts stock GRBL’s pin-11 frequency at 1 kHz, which is precisely why his build runs cprezzi’s grbl-servo fork: the modification’s entire job is dropping that pin from 1 kHz down to 50 Hz so an SG90 can actually understand it.
Once you are on a servo-aware fork, pen moves arrive as spindle commands. In vankesteren/grbl-servo, M3 S255 drops the pen and M5 (or M3 S0) lifts it; that fork also notes its servo code only works with laser mode off, meaning $32=0. Inkscape’s 4xiDraw extension, used by a lot of the A4 builds, emits M3 S30 for pen up and M3 S90 for pen down instead. And bdring/Grbl_Pen_Servo takes a third road entirely: it keeps a full virtual Z axis, lifting the pen any time the work Z is above zero and dropping it at zero or below.
Arduino Uno + CNC Shield V3, pen-plotter wiring

  X driver socket  ->  stepper 1  (belt, left-right)
  Y driver socket  ->  stepper 2  (belt, front-back)
  Z driver socket  ->  empty
  D11 / Z+ header  ->  servo signal  (pen up/down)
  5V, GND          ->  servo power
  12V barrel in    ->  shield power terminals
That is the whole machine, electrically. Three of the shield’s four driver sockets go unused.
The parts that decide whether it draws a circle or an oval
This post contains affiliate links. If you buy through them, this site earns a commission at no extra cost to you.
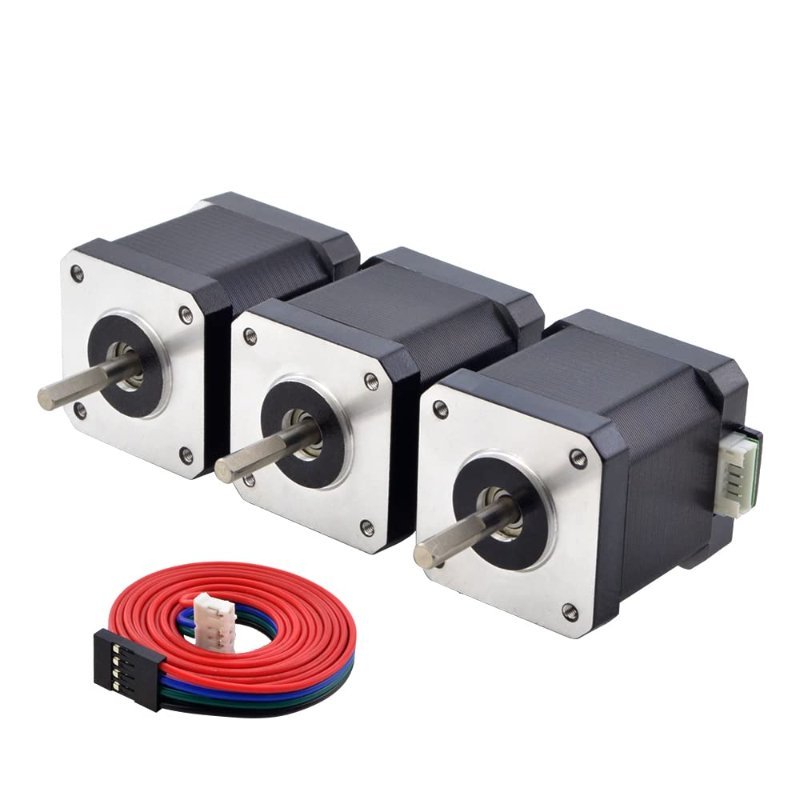
Start with the motors, because everything downstream is calibrated against them. You want standard Nema 17 frames — the 42 mm square that every 3D-printed plotter bracket on the internet is designed around. Torque matters less than you would think on a plotter; a pen weighs nothing. What matters is that both motors are the same motor, so one steps/mm figure covers both axes. Buying a multipack is the cheap way to guarantee that, and the spare saves you a week of shipping when you inevitably strip a pulley grub screw.
Two matched motors for X and Y plus a spare, from the brand that most hobby CNC documentation is written around. 1.8° per full step, standard 42 mm frame, four-lead bipolar — exactly what an A4988 driver expects.
Check Price on Amazon →G1 X100 F400. Then measure how far the pulley actually turned and back-calculate your own steps/mm instead of trusting the number off a forum. Once that matches, add a pair of mechanical limit switches to the shield’s X- and Y- pins and switch homing on — a plotter that cannot find its own origin will draw a beautiful picture 30 mm off the page.
Next, the board that turns G-code into motion. The CNC Shield V3 plugs straight onto an Uno and breaks out four stepper driver sockets, the limit switch pins, and the spindle PWM pin you are about to hijack for the pen. Get it as a kit with A4988 drivers and heatsinks already included; buying the shield bare and then discovering your drivers are a different pinout is a tedious way to learn.
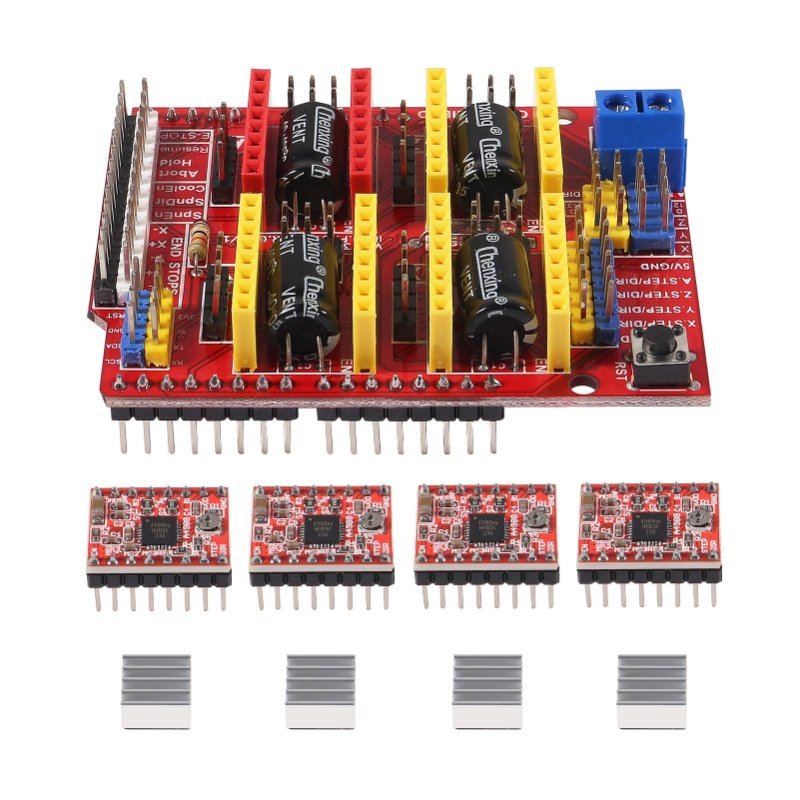
The standard GRBL control stack. Four driver sockets (you will use two), jumper headers for microstepping, screw terminals for 12V in. Fit the heatsinks before you power it up, not after.
Check Price on Amazon →Then the motion hardware, which is where accuracy actually lives. GT2 belt has a 2 mm tooth pitch and essentially zero stretch under the trivial loads a pen generates, and a 20-tooth GT2 pulley is the de facto standard on both ends. Buy belt, pulleys, idlers and tensioners together — a plotter with a slack belt produces drawings where every change of direction leaves a visible notch, and no amount of firmware tuning fixes it.
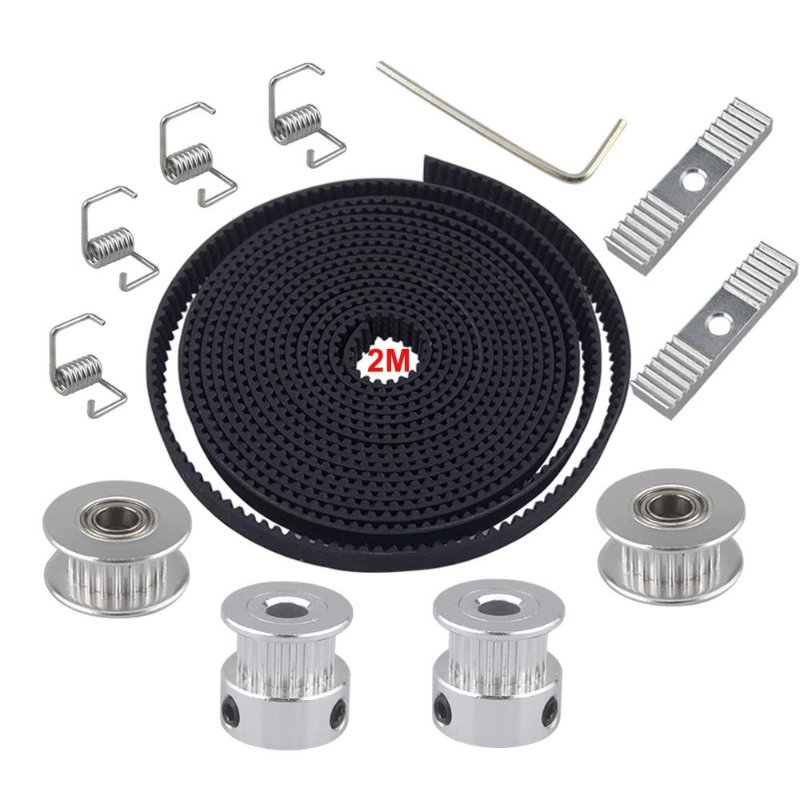
Two metres of 6 mm GT2 belt, two 20-tooth 5 mm-bore pulleys, idlers and tension springs in one box. The 20-tooth pulley is what the standard 80 steps/mm figure is derived from, so matching it keeps your calibration boring.
Check Price on Amazon →Finally the pen lift. An SG90-class 9 g micro servo is the universal answer here, and it is the part most likely to die during tuning: bdring’s pen-servo firmware warns outright that driving the servo past its mechanical endpoint will make it overheat and damage itself. Buy them in a pack and treat the first one as a consumable while you dial in the up and down values.
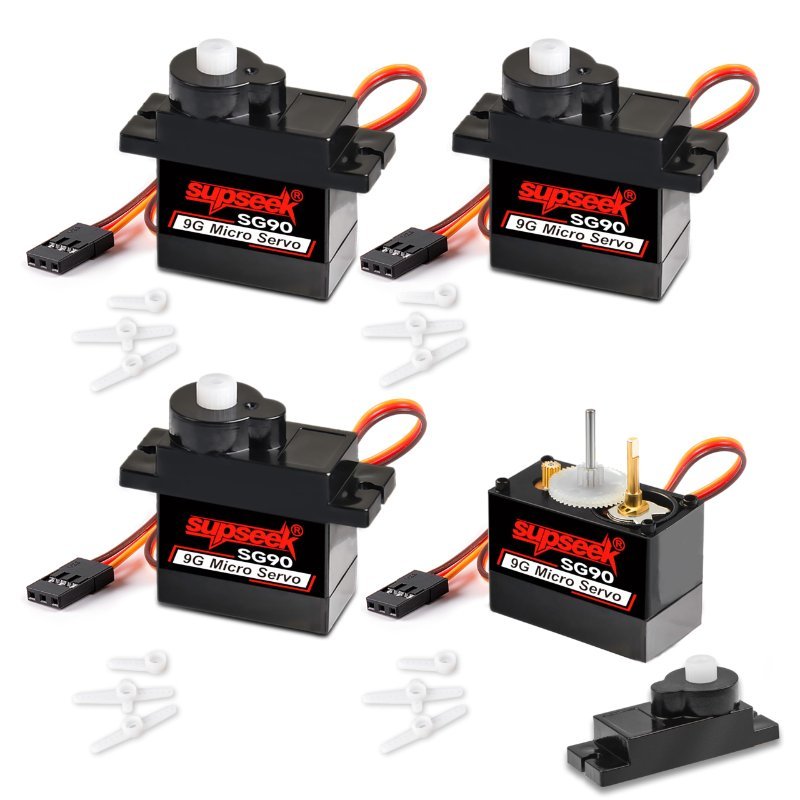
The exact class of servo the plotter firmware forks are written against. Four of them costs about what one does from a hobby shop, which matters because you will cook at least one finding your endpoints.
Check Price on Amazon →The one number that makes it draw to scale: 80
Across essentially every belt-driven Uno plotter writeup, the X and Y steps/mm settings come out the same: $100=80 and $101=80. That is not folklore, it is arithmetic you can check:
200 full steps per revolution  (1.8° stepper)
  x 16 microsteps               (A4988, three jumpers set)
  = 3200 steps per revolution

20 teeth x 2 mm GT2 pitch       = 40 mm of belt per revolution

3200 steps / 40 mm              = 80 steps per mm
Change either the pulley tooth count or the microstepping jumpers and that number moves, which is the single most common reason a first plot comes out at the wrong size. The Z steps/mm value, meanwhile, is pure fiction on a servo machine — Nedelkovski sets his to 40 and says plainly that it is not accurate in terms of real motion. It only has to be consistent enough for the firmware to decide up from down.
For speed, start slower than feels right. One build sets $110=500 and $111=500 for a 500 mm/min ceiling on both axes and recommends keeping actual feed rates around 300 to 500 mm/min, because inexpensive steppers skip steps when pushed — and a skipped step on an open-loop machine is never recovered. The machine does not know it missed; every line after that is offset. That is the practical case for closed-loop feedback, which we get into in how encoders work.
The software chain, and three ways people wire it up
You need something to turn a drawing into G-code, and something to stream that G-code to the Uno at 115200 baud. The documented combinations split roughly three ways: Inkscape with the 4xiDraw extension generating, LaserGRBL sending; Inkscape’s gcodetools generating, Universal Gcode Sender streaming; or GRBL-Plotter (Nedelkovski uses v1.6.3.2) doing both jobs in one window. None is wrong. The one-program option is the least frustrating when you are still changing pen-up and pen-down values every ten minutes.
What actually goes wrong
- Only one axis moves. One builder traced exactly this to a clone Uno and a missing CH340 USB driver — the board enumerated well enough to accept a sketch but not to behave. Worth ruling out before you suspect the shield.
- The servo buzzes and never settles. Almost always stock GRBL on pin 11 at the wrong frequency. Flash a servo fork.
- Lines are the right shape, wrong size. Steps/mm, every time. Recheck the arithmetic above against your actual pulley.
- Corners show a small notch. Belt tension, or a pulley grub screw that is not seated on the motor shaft’s flat.
- The pen tears the paper on the first stroke. Pen-down value too aggressive. A sprung pen mount is more forgiving than a precise servo angle.
Is it worth building?
Build it. Not because you need plotted drawings — you do not — but because a plotter is the cheapest machine that forces you to care about accuracy. A robot that wanders two millimeters off course still looks like it works. A plotter that wanders two millimeters draws a visibly crooked line, on paper, where you cannot talk yourself out of it. Every hour you spend chasing that line teaches you something about microstepping, belt tension, or acceleration that you will carry into every motion project afterward.
And the entry price is absurd. Two steppers, a shield, a belt kit, a servo, and an Uno you probably already own. The frame is whatever you can cut, print, or scavenge. That is the whole barrier.