Powering an Arduino looks like the most boring decision in the whole hobby, right up until the moment your project starts rebooting itself mid-loop and you spend two evenings blaming your code. Power is where a surprising share of “my project is haunted” problems actually live. So here is the short version, and then the reasoning behind it: use USB while you’re writing code, use a 9V wall adapter once the project lives somewhere, and stop reaching for 9V batteries entirely.
The three ways in, and what they actually do
An Arduino Uno has three physical power entrances, and they are not equal.
The USB port delivers a regulated 5V straight from your computer or a phone charger. It’s the cleanest voltage the board will ever see, because something else already did the regulating. The catch is current: the Uno’s USB path runs through a resettable polyfuse — a self-healing fuse that trips on overcurrent and resets once it cools — rated to trip at roughly 500mA. That’s plenty for the microcontroller, a handful of sensors and some LEDs. It is not plenty for motors.
The barrel jack is the round socket next to the USB port. It wants 7–12V DC on a 5.5mm outer / 2.1mm inner plug that is center positive — the pin in the middle is the positive side. Whatever you feed it goes through the board’s onboard regulator to make the 5V rail. On an Uno R3 that regulator is an NCP1117, a linear regulator, and the word “linear” is doing a lot of work in the next section.
The VIN pin is electrically the same destination as the barrel jack, just exposed as a header pin for when you’re wiring power in from a battery pack or a shield instead of a plug. Same 7–12V expectation, same regulator, and the same rule: never feed VIN and the barrel jack at the same time.
There’s a fourth hole people misuse: the pin labeled 5V. That’s an output in normal use. You can back-feed regulated 5V into it, but you bypass every protection on the board — no reverse-polarity diode, no regulator — so a wiring slip there kills the microcontroller instead of blowing a fuse. Don’t make it your default.
Why 12V isn’t “more headroom,” it’s more heat
A linear regulator doesn’t convert extra voltage into anything useful. It burns it off as heat. The arithmetic is unforgiving and worth memorizing:
Watts wasted = (input voltage − 5V) × current drawn
Feed an Uno R3 12V while it pulls 200mA for a few sensors, and the regulator dissipates (12 − 5) × 0.2 = 1.4 watts. The regulator lives in a small SOT-223 package with a thermal resistance around 50°C per watt and no real heatsink under it, so that’s roughly a 70°C rise over room temperature. That’s the “why is my Arduino hot?” post that gets written on a forum every single week. Feed the same board 9V at the same current and you’re dissipating 0.8W instead — a little over half the heat, for no loss of function.
That’s the whole case for 9V as the default. It clears the regulator’s dropout requirement comfortably, it leaves margin for a slightly sagging supply, and it wastes the least heat of anything in the legal range. Note that the newer Uno R4 changes this math: it uses an ISL854102 buck converter instead of a linear regulator, which chops and switches the input rather than burning the difference, so it accepts up to 24V without the same heat penalty. If you’re on an R3 — and most beginners are — assume the heat math applies.
The wall adapter to actually buy
This post contains affiliate links. If you buy through them, this site earns a commission at no extra cost to you.
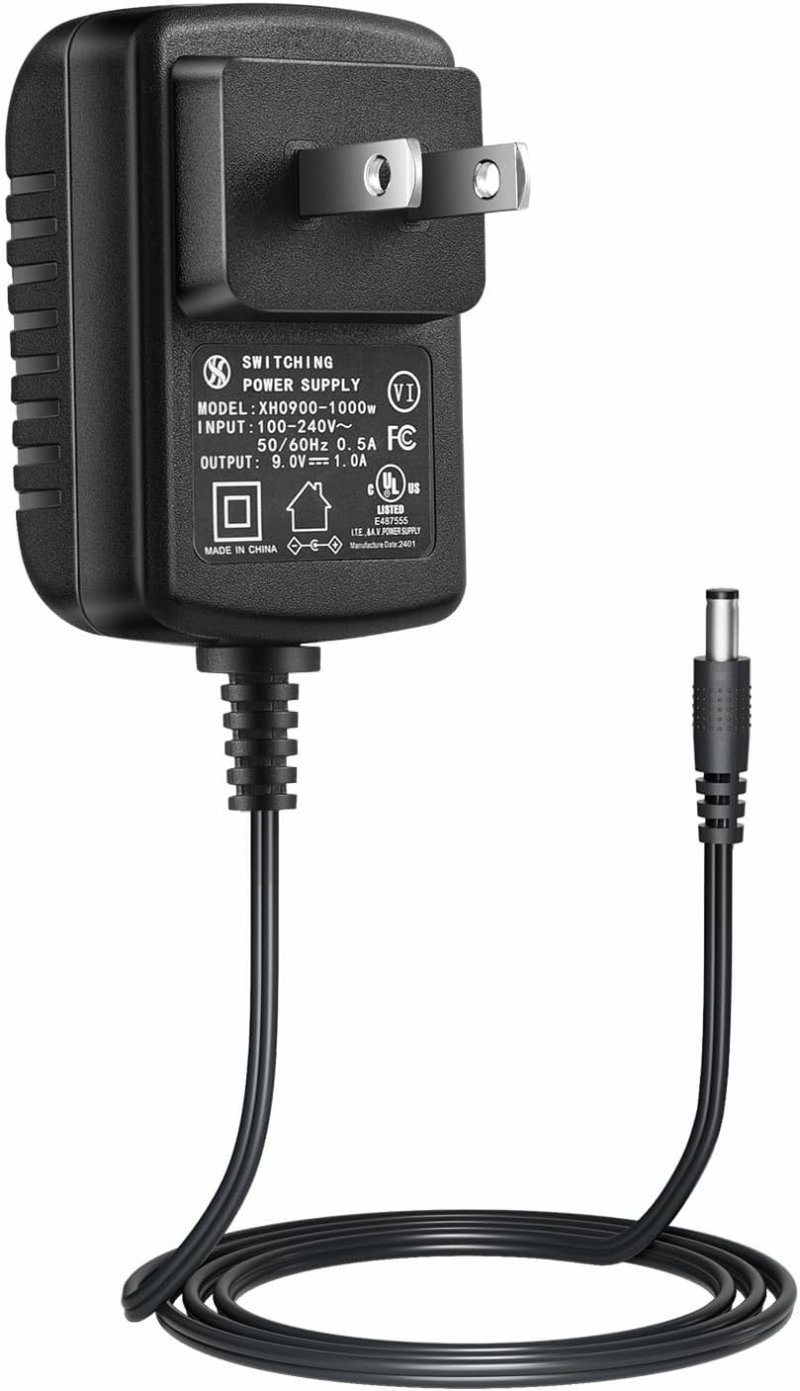
You want three things and nothing else: 9V output, at least 1A of current headroom, and a 5.5×2.1mm center-positive plug. The center-positive part matters enough that it’s worth checking twice — guitar pedal supplies look identical and are overwhelmingly center negative, which is how people fry boards with a plug that fit perfectly. A UL listing is worth the extra dollar or two on something that will sit plugged into a wall unattended for months.
Exactly the boring, correct spec: regulated 9V, 1A of headroom, center-positive barrel plug, UL listed, and a 6.8-foot cord so the board doesn’t have to live next to the outlet. Buy one and stop thinking about power for the rest of the project.
Check Price on Amazon →The 9V battery problem
The rectangular 9V PP3 battery is the single most tempting wrong answer in this hobby. It’s 9V, the barrel jack wants 9V, the clip adapters cost a dollar. And it will disappoint you within an hour.
An alkaline 9V holds roughly 500–600mAh. A single AA holds around 2000mAh+ — so one AA carries three to four times the charge of the battery that’s four times its size. Worse, the 9V has high internal resistance, around 1.5 ohms when fresh and climbing as it drains, which means the voltage sags hard the moment your project draws real current. And then the linear regulator takes its cut: at 100mA you’re burning 4V × 0.1A = 0.4W as heat, meaning barely half the energy in that already-small battery reaches your circuit at all.
Use AA cells instead. Six of them in series gives you 9V from the same chemistry, with several times the capacity and far less voltage sag, at a lower cost per hour of runtime. A holder with a built-in switch and a barrel plug already attached means you’re plugging into the same jack the wall adapter uses — no soldering, no adapter clip, and an actual off switch so the project isn’t draining cells on the shelf.
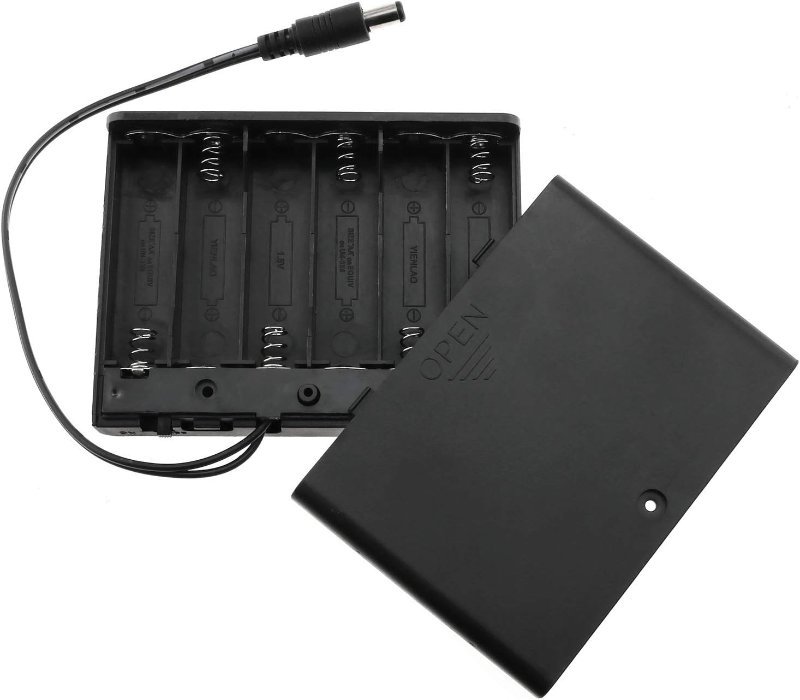
Six AAs in series land right at 9V, which is the same sweet spot as the wall adapter. Enclosed case, on/off switch, and the correct barrel plug already wired — it drops into the Arduino’s jack with nothing else to buy.
Check Price on Amazon →When none of the three is enough
Everything above powers the board. Motors are a different conversation, and this is the mistake that produces the most confusing symptoms. A single SG90 micro servo can spike to around 700mA when it stalls against a load. Pull that through the Arduino’s 5V rail and the rail sags toward 3.8V, which drops under the ATmega328P’s brown-out detection threshold, and the chip resets. From the outside this looks like a software bug: the sketch restarts, the servo twitches, the serial output starts over from the top. It isn’t a bug. It’s the power supply saying no.
The fix is structural, not a bigger adapter: give the motors their own supply, and tie that supply’s ground to the Arduino’s GND pin. Two power sources with separate, unconnected grounds have no shared reference voltage, so your signal wires are measuring against nothing. Common ground is not optional. If your project has motors in it, read the robot power guide and the motor troubleshooting checklist before you buy anything.
The short answer
Develop over USB, because it’s free, it’s clean, and the cable is already plugged in for uploading code anyway. Once the project leaves your desk and needs to run on its own, move it to a 9V 1A center-positive wall adapter. If it needs to be portable, use six AAs, not a 9V brick. And the moment a motor enters the picture, give it a separate supply and a common ground. That covers nearly every project a beginner will build, and it eliminates a whole category of bugs that aren’t really bugs.