You hit upload, the IDE churns for ten or fifteen seconds, and then the console fills with the same wall of orange text that every Arduino owner eventually meets:
avrdude: stk500_recv(): programmer is not responding
avrdude: stk500_getsync() attempt 1 of 10: not in sync: resp=0x00
It reads like a hardware death sentence. It almost never is. This error is a communication failure, not a broken chip, and there is a short list of things that cause it — worth working through in order, because the cheapest fix is also the most likely one.
What the error is actually telling you
Two bits of jargon, because the message is more informative than it looks. avrdude is the command-line program the Arduino IDE quietly calls to do the real uploading — the IDE compiles your sketch into a .hex file and then hands it off. stk500 is the protocol avrdude uses to talk to the bootloader, a tiny program burned into the microcontroller that runs before your sketch does. Atmel designed the STK500 protocol for its own development kit years ago, and Arduino bootloaders (Optiboot, on the Uno) speak a subset of it.
So stk500_recv(): programmer is not responding translates to: avrdude opened the serial port, sent a sync byte, and waited. Nothing came back. The resp=0x00 on the next line is literally saying the response was zero.
That is useful, because it rules something out. avrdude found a serial port to talk to. If it had not, you would be looking at a completely different failure — that is the case covered in Arduino not detected by your computer. Here the port exists. The board on the far end of it is not answering.
How the upload is supposed to work
Understanding the handshake makes the fixes obvious instead of superstitious. When avrdude opens the serial port it toggles the DTR line (data terminal ready, a control signal left over from the modem era). On the board, DTR runs through a 100 nF capacitor to the reset pin. That capacitor is the whole trick: it converts a sustained voltage change into a brief pulse, so the chip gets a momentary reset rather than being held in reset forever.
The chip resets, the bootloader runs first, and it listens for roughly a second for avrdude to say hello. If it hears the sync byte, it accepts the incoming sketch. If it hears nothing, it shrugs and jumps to whatever sketch is already flashed. Every cause below is a way of breaking one link in that chain.
1. Suspect the cable first
This is the one people skip because it feels too dumb to be the answer, and it is the most common cause by a wide margin. Enormous numbers of USB cables in circulation — the ones bundled with power banks, e-readers, shavers, cheap chargers — have only the two power conductors wired. The D+ and D- data lines are not connected to anything.
Plug your Uno into one of those and it looks completely healthy. The green power LED comes on. The board runs its existing sketch. And no data moves in either direction, so avrdude sends its sync byte into a void. If your COM port shows up but uploads always fail, swap the cable before you change a single setting. Grab a known-good data cable and keep it on the bench specifically for this — the boring generic one is fine, it just has to be a real data cable.
This post contains affiliate links. If you buy through them, this site earns a commission at no extra cost to you.
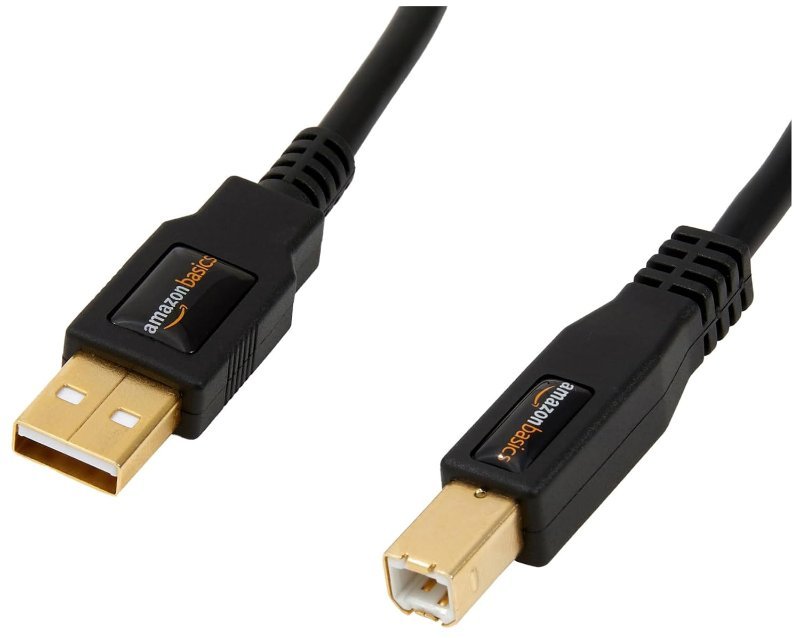
The standard printer-style cable the Uno and Mega use, fully wired for data at USB 2.0 speeds. Six feet is the right length — the 10-foot version exists, but long runs are one more variable you do not want while chasing an upload fault. Buy one, label it, and never wonder about it again.
Check Price on Amazon →L LED wired to pin 13. Optiboot flashes it the instant it starts. Get that flash on every reset press and your bootloader is alive, which means the fault is upstream — cable, port, or driver. Never see it flash, and the bootloader is corrupted or missing, and no cable swap on earth will fix that; you would need a USBasp programmer to burn a fresh one through the ICSP header.
2. Wrong board, wrong port, or wrong processor
Check Tools > Board and Tools > Port. Obvious, but the IDE cheerfully lets you compile for an Uno and upload to a port with a Mega on it, and the resulting failure is exactly this error.
The sneakier version of this affects the Nano. Under Tools > Processor you get both ATmega328P and ATmega328P (Old Bootloader). They are not cosmetic labels — they upload at different baud rates, 115200 for the newer bootloader and 57600 for the old one. A huge share of the inexpensive Nano clones on the market still ship with the old bootloader, and picking the wrong entry produces this precise error with a working board and a working cable. If you have a clone Nano and everything else checks out, flip that setting and try again. (More on the differences in our Uno vs. Nano comparison.)
3. Get everything off pins 0 and 1
Pins 0 (RX) and 1 (TX) are not ordinary digital pins. They are the board hardware serial line, and they are physically shared with the USB-to-serial chip that handles uploads. Anything you wire to them — a Bluetooth module, a GPS breakout, a second Arduino, even a stray jumper resting in the hole — is fighting avrdude for the same two wires.
Pull those connections and try the upload again. Same goes for shields: lift the shield off entirely and upload with a bare board. Plenty of shields route signals through 0 and 1 without making that obvious on the silkscreen. If the upload succeeds with the shield off, you have found your culprit and can decide whether to move that peripheral onto SoftwareSerial pins instead.
4. The driver, if you are running a clone
A genuine Uno R3 uses a second microcontroller, the ATmega16U2, to handle USB. Most inexpensive clones instead use a WCH CH340G chip, which is functionally fine and considerably cheaper, but needs its own driver. The usual symptom is no serial port at all rather than this error, but a half-installed or stale driver can enumerate a port that does not actually pass data — which lands you right back at resp=0x00.
On Windows, the driver package is WCH CH341SER, and it covers the CH340 despite the name. Recent Windows builds often pull it down through Windows Update on their own. On macOS, try the board with no driver first — recent versions ship with support — and only install a package if the port refuses to appear. Uninstalling and reinstalling cleanly is worth doing if you have ever installed a driver from a random vendor download page.
5. Power problems and the reset timing trick
If your project draws serious current — a bank of servos, a motor driver, a strip of addressable LEDs — the board can brown out at exactly the wrong moment. The bootloader needs a stable rail for its one-second listening window, and a voltage sag during that window kills the handshake. Disconnect the loads, upload to a bare board, then reconnect.
There is also a manual workaround worth knowing for boards where the auto-reset circuit has failed (a cracked solder joint on that 100 nF capacitor will do it). Start the upload, watch the IDE status bar, and press the reset button by hand the instant the compile finishes and it says it is uploading. You are manually recreating the reset pulse the capacitor should be generating. It takes a few tries to get the timing, and if it works reliably, you have diagnosed the auto-reset circuit rather than the software.
The order to check things in
- Swap in a cable you know carries data.
- Confirm Board, Port, and (on a Nano) Processor.
- Remove anything wired to pins 0 and 1, and lift any shield.
- Reinstall the CH340 driver if the board is a clone.
- Disconnect motors, servos, and LED strips, then upload to a bare board.
- Try the manual reset-button timing trick.
- Only then consider reburning the bootloader.
Nine times out of ten you never make it past step three. The reason this error has such a fearsome reputation is that the message sounds like silicon failure when it is really just two devices failing to say hello — and one of them is usually holding a cable that was never wired to speak in the first place.