You hit Upload, the TX light flickers once, and the console dumps eight identical lines of avrdude: stk500_recv(): programmer is not responding. It reads like your board just died. It almost never has.
That message is not a diagnosis. It is avrdude — the command-line tool the Arduino IDE quietly shells out to every time you upload — reporting that it said hello down the serial port and nothing coherent came back. Eight retries, eight silences, give up. Everything below is about figuring out why nobody answered, because the error itself will never tell you.
What “stk500” is actually referring to
STK500 is an old Atmel programming protocol, named after a development board from the early 2000s. Your Uno doesn’t have that board on it, but the small program burned into the top of its flash memory — the bootloader, usually a variant called Optiboot — speaks that protocol. That is the whole arrangement: avrdude talks STK500, the bootloader listens for STK500, and your sketch gets written into flash in between.
The timing matters, because it explains most failures. When avrdude opens the serial port it toggles the DTR line, which is wired through a capacitor to the ATmega’s reset pin. The board resets, the bootloader wakes up, listens for roughly a second, and if it hears nothing it hands control to whatever sketch is already loaded. So the handshake window is narrow, and anything that blocks it — a wrong baud rate, a busy serial line, a missing driver, a bootloader that isn’t there anymore — produces the exact same unhelpful message.
Start with the two settings that are wrong most of the time
Tools → Board and Tools → Port. Check both before you touch anything physical. Selecting “Arduino Nano” while an Uno is plugged in, or leaving the port pointed at a device you unplugged twenty minutes ago, produces this error every time.
There is one specific trap worth knowing about. Nano clones manufactured before roughly 2018 ship with the older bootloader, which runs at 57600 baud instead of the newer 115200. If the IDE is set to the new one, avrdude transmits at a speed the bootloader physically cannot parse and you get silence. The fix is Tools → Processor → ATmega328P (Old Bootloader). If you bought a cheap Nano three-pack and none of them will upload, try this before you try anything else.
One more board-specific note: the Uno R4 doesn’t use avrdude at all — it’s a Renesas chip with native USB, uploaded through a different tool entirely. If you own an R4 and you’re staring at an avrdude error, you have an R3 selected in the Board menu.
Your cable might not carry data
This one catches people constantly, and it’s maddening because the board looks completely fine. Plenty of USB cables — especially the ones bundled with power banks, phone chargers, and battery cases — have only the power and ground conductors wired. The two data lines are absent. Plug one into an Uno and the power LED lights up, the board runs its last sketch happily, and no serial device ever appears on your computer.
The test takes five seconds: open Tools → Port with the board unplugged, note what’s listed, plug it in, and open the menu again. If nothing new appears, the problem is upstream of your code — it’s the cable or the driver. Swap in a cable you know has moved data before, like the one from a printer or an external drive.
This post contains affiliate links. If you buy through them, this site earns a commission at no extra cost to you.
If you don’t have a known-good spare, buy one and stop guessing. A plain USB-A to USB-B cable is what the Uno and Mega use, and having one that lives permanently on the bench removes an entire category of wasted afternoon.
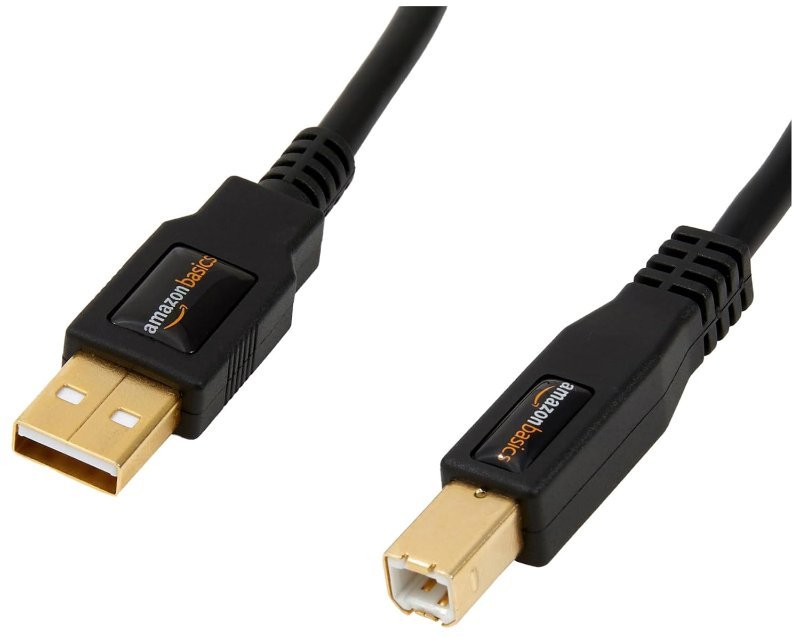
A full-spec USB 2.0 cable with both data lines actually connected — the thing you want when you need to rule the cable out rather than wonder about it. Fits the square USB-B port on the Uno, Mega, and most clone boards.
Check Price on Amazon →Anything wired to pins 0 and 1 will block the upload
Digital pins 0 and 1 are not general-purpose pins. They’re RX and TX — the hardware serial pair — and they are physically connected to the USB-to-serial chip that carries your upload. Whatever you attach to them is sitting directly on the wire avrdude is trying to use.
An HC-05 Bluetooth module on pins 0 and 1 is the classic offender: it works beautifully until the moment you try to reflash the board, then it holds the line and the handshake never lands. Shields do it too — some LCD and motor shields route their own signals through those pins. Pull everything off 0 and 1, lift any shield off the headers, upload, then put it all back. If that fixes it, move your module to a software serial pair on other pins and the conflict goes away permanently.
Clone boards usually need a driver you don’t have
A genuine Uno R3 handles USB with a second Atmel chip, the ATmega16U2, which every operating system already recognizes. Inexpensive clones use a cheaper Chinese USB-serial chip instead — usually a CH340 or CH341, sometimes an FT232RL on Nano boards. macOS and current Linux kernels generally include CH340 support. Windows frequently does not.
The tell on Windows is Device Manager: look for an entry called “USB2.0-Serial” or “USB Serial” carrying a yellow warning triangle, sitting under Other Devices rather than Ports. Install the CH340 driver from the manufacturer, WCH, and reboot. If Windows insists the driver is already present but the board still won’t enumerate, uninstall it first, then reinstall — a half-installed CH340 driver is a very common state and it fails silently.
When nothing above works, the bootloader is gone
If the port appears cleanly, the driver is installed, the board and processor are right, and nothing is touching pins 0 and 1 — and it still won’t upload — you’re probably looking at a corrupted bootloader or scrambled fuse bytes. Fuses are a handful of configuration bits on the chip that control things like clock source and whether a bootloader section exists at all. A failed upload attempt through an ISP programmer, or a board that was flashed with the wrong settings, can leave them in a state where nothing on the USB side can help.
The way out is to stop using USB entirely and write to the chip directly through the 2×3 ICSP header — the six pins near the USB jack. That header exposes SPI: clock, data in, data out, plus reset and power. A programmer connected there talks to the ATmega’s hardware programming interface, which exists below the bootloader and doesn’t care whether the bootloader is intact. It’s the only way to put one back.
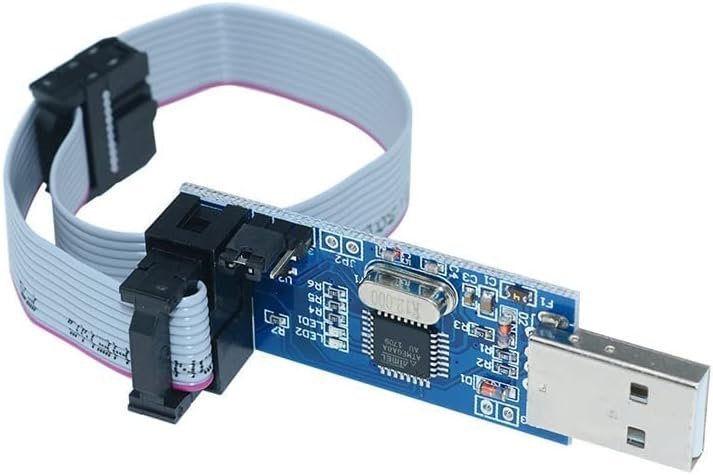
The USBasp is the cheap, ubiquitous tool for this, and it’s the one I’d keep in a drawer. Plug it in, set Tools → Programmer → USBasp, click Tools → Burn Bootloader, and the IDE calls avrdude with the right fuse values for your board. Two practical notes: the board has a jumper selecting whether it supplies 3.3V or 5V to the target, and getting that wrong is its own afternoon — see 5V vs. 3.3V logic levels if that distinction is fuzzy. And on Windows, the default libusb-win32 driver often refuses to work; use Zadig to swap it to libusbK and it comes right up.
Ten-pin ISP programmer with a 3.3V/5V jumper and a ribbon cable in the box. It bypasses USB serial entirely and writes straight to the chip, which makes it the only thing that recovers a board whose bootloader is actually gone. Cheap enough that owning one before you need it is the obvious move.
Check Price on Amazon →avrdude -c usbasp -p m328p -v from a terminal — it prints the chip signature and current fuse bytes without writing anything, so you get a safe look at what the programmer sees. Then go further: burn a bootloader onto a bare ATmega328P-PU, drop it on a breadboard with a 16MHz crystal and two 22pF capacitors, and you’ve built an Arduino from parts for about three dollars.
The order I’d actually work through it
Cheapest checks first, because the expensive ones are almost never the answer:
- Confirm the board and port selections match what’s plugged in.
- Unplug anything connected to pins 0 and 1, and lift any shield.
- Watch Tools → Port as you plug and unplug — if no port ever appears, it’s the cable or the driver.
- Swap the USB cable for one you know carries data.
- On a clone board, install or reinstall the CH340 driver.
- On an older Nano, switch Processor to ATmega328P (Old Bootloader).
- Press reset the instant compiling finishes and the upload begins — occasionally the auto-reset capacitor is the weak link.
- Only now reach for the ISP programmer and reburn the bootloader.
In practice, steps one through four resolve the overwhelming majority of these. The error looks alarming out of proportion to its usual cause, which is what makes it worth having a checklist instead of a panic response.