Jumper wires are the part nobody researches. You buy a bag, they work, and you never think about them again — until the afternoon you spend three hours convinced your sensor is dead, only to discover one wire has a broken conductor hiding inside intact-looking insulation. That wire looks perfect. It is not perfect. It is the reason nothing works.
I have gone through a lot of these bags. The differences between a good set and a bad one are small, specific, and almost never printed on the packaging — so here is what actually matters, and the three kits I keep buying.
First: there are two different products both called “jumper wires”
People use the term for two things that are not interchangeable, and buying the wrong one is the most common beginner mistake here.
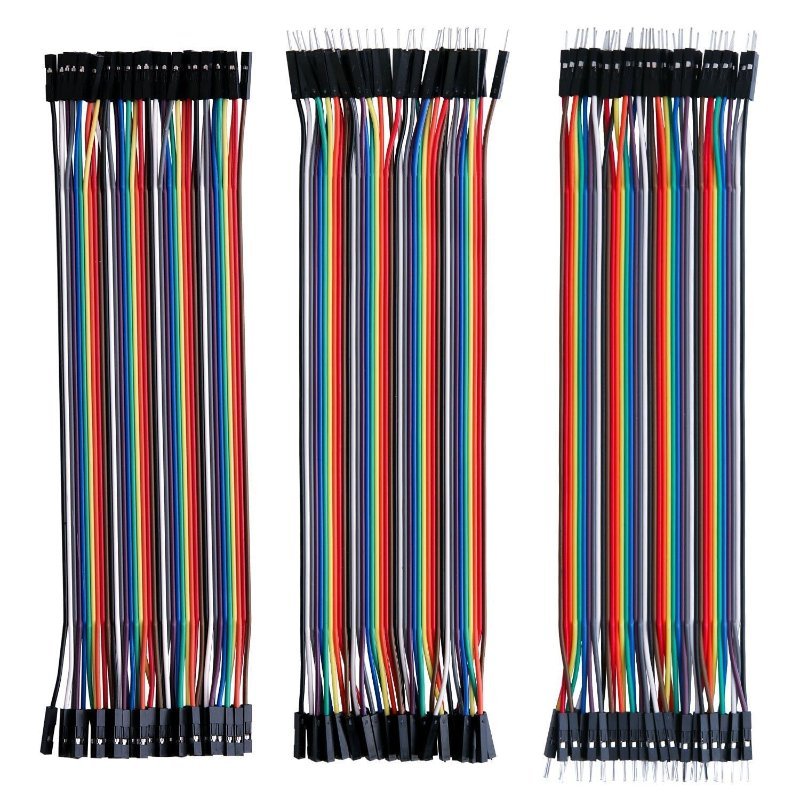
Dupont wires are the flexible, multicolored ribbon cables with plastic-housed pins on each end. The housings are on a 2.54 mm pitch — that is 0.1 inches, the spacing between pins on essentially every Arduino header, sensor breakout, and 0.1″ header strip in the hobby world. They come in three flavors: male-to-male (breadboard to breadboard), male-to-female (breadboard to a module’s female header), and female-to-female (board pin to board pin). Inside, the conductor is stranded, usually 24–28 AWG.
Solid-core breadboard wire is the other thing: rigid single-conductor wire, usually 22 AWG, pre-bent into little staples and pre-stripped at both ends. No housings, no plastic — the bare wire goes straight into the breadboard hole. AWG, incidentally, runs backwards: a higher number means a thinner wire. 22 AWG is thicker than 26 AWG.
You want both. They solve different problems, and I will get to why.
The specs that actually matter
Gauge, and why 22 AWG is the magic number. A solderless breadboard hole is a sprung metal clip sized to grip a specific range of wire. The community consensus — and Adafruit’s own guidance — is that 22 AWG solid (about 0.64 mm) is the correct size. Go thinner and the clip does not grip firmly, which gives you an intermittent connection that works when you press on it and fails when you do not. Go thicker and you permanently spread that clip, so every future wire in that hole is loose. One 20 AWG wire can quietly ruin a hole for good.
Solid vs. stranded is not a preference. Stranded wire pushed into a breadboard hole frays — individual strands splay sideways and short against the neighboring row, or fold over instead of seating. That is why Dupont wires have those crimped pins on the end: the pin is the solid part. Never strip a Dupont wire and jam the bare stranded end into a breadboard.
Conductor material is where cheap kits cheat. The thing to avoid is CCA — copper-clad aluminum, an aluminum core with a thin copper skin. Aluminum has roughly 61% of copper’s conductivity, so the same gauge in CCA carries up to about 1.55× the resistance. Worse for our purposes: aluminum work-hardens. Bend a CCA jumper a few dozen times and the core snaps inside the insulation, which is exactly the invisible-failure scenario from the first paragraph. Listings worth buying say pure copper or tinned copper; listings worth skipping say nothing at all.
Current: treat these as signal wire. Dupont contacts are typically rated somewhere in the 1–3 A range per contact, but the thin stranded wire behind them is the real limit — 26 AWG is comfortable around 0.3 A. That is fine for I²C, SPI, serial, and digital pins, which pull milliamps. It is not fine for motors. If you are powering anything that spins, the current belongs on thicker wire through a proper driver — see how motor drivers actually work for why routing motor current through your logic wiring goes badly.
Crimp quality is the actual failure point. Not the wire, not the plastic — the crimp where the two meet. A bad crimp reads fine on a meter until you wiggle it. This is the single thing you cannot inspect before buying, and it is the main reason to pay two dollars more for a set from a vendor with a track record.
The kits worth buying
This post contains affiliate links. If you buy through them, this site earns a commission at no extra cost to you.
The everyday driver. If you buy exactly one set, buy the ELEGOO 120-piece assortment: 40 male-to-female, 40 male-to-male, and 40 female-to-female, all 20 cm, all separable from the ribbon so you can peel off a group of six for a display header or a single wire for a stray ground. Getting all three genders in one box matters more than it sounds — the moment you add a sensor breakout with female headers to a breadboard project, you need male-to-female, and single-type packs always leave you short of the one you need at 11pm. ELEGOO’s crimps have been consistent across the several sets I have gone through, and 20 cm is the right default length: long enough to reach across a full-size breadboard, short enough not to turn the desk into a nest.
All three connector genders, 40 of each, 20 cm, separable ribbon. The default set that lives on the bench.
Check Price on Amazon →For breadboards that stay readable. Dupont wires are flexible, which is great for reaching a module and terrible for a dense breadboard — ten of them turn into spaghetti you cannot trace. Preformed solid-core wire is the fix: rigid 22 AWG staples that lie flat against the board in exactly the shape you bent them into. This 140-piece set covers 14 lengths from 2 mm to 125 mm, ten of each, sorted in a hinged box so you can grab the right span instead of trimming one. Once you have wired a circuit this way, the difference in how easy it is to read your own breadboard three days later is not subtle. Use these for the power rails and short hops, and save the flexible wires for anything that leaves the board.
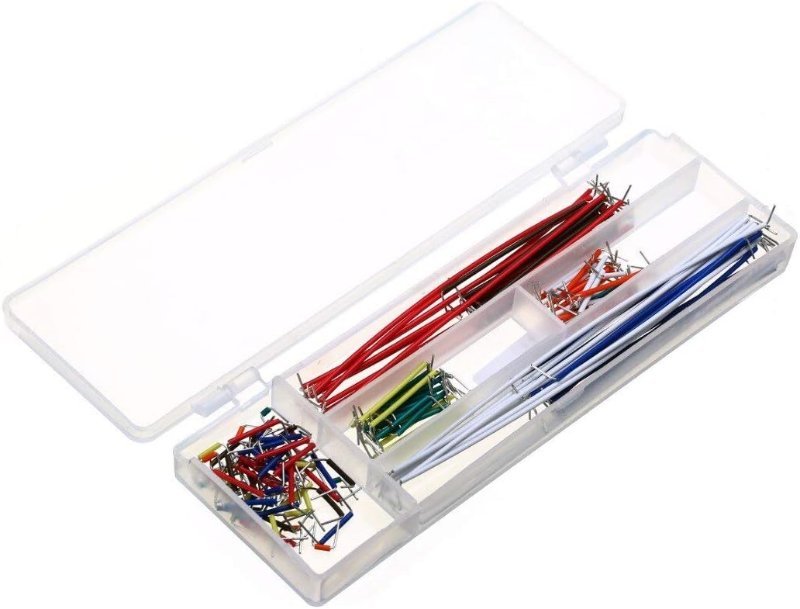
14 lengths, 2–125 mm, 9 colors, pre-stripped and pre-bent, in a sorted box.
Check Price on Amazon →When 20 cm is not enough. The standard length stops being enough the second your project leaves the breadboard — a sensor mounted on the far side of an enclosure, a board bolted to a chassis, a display you want to hold up while testing. EDGELEC’s 40 cm male-to-female set is the one I reach for there: 120 wires, 12-strand pure copper, with brass nickel-plated terminals rather than the bare-steel crimps you find in the bottom-tier bags. Nickel plating matters over time — it is what keeps the contact from oxidizing into a high-resistance joint in a garage or a basement. Buy these in addition to the 20 cm set, not instead of it; excessive length on a breadboard is its own kind of mess.
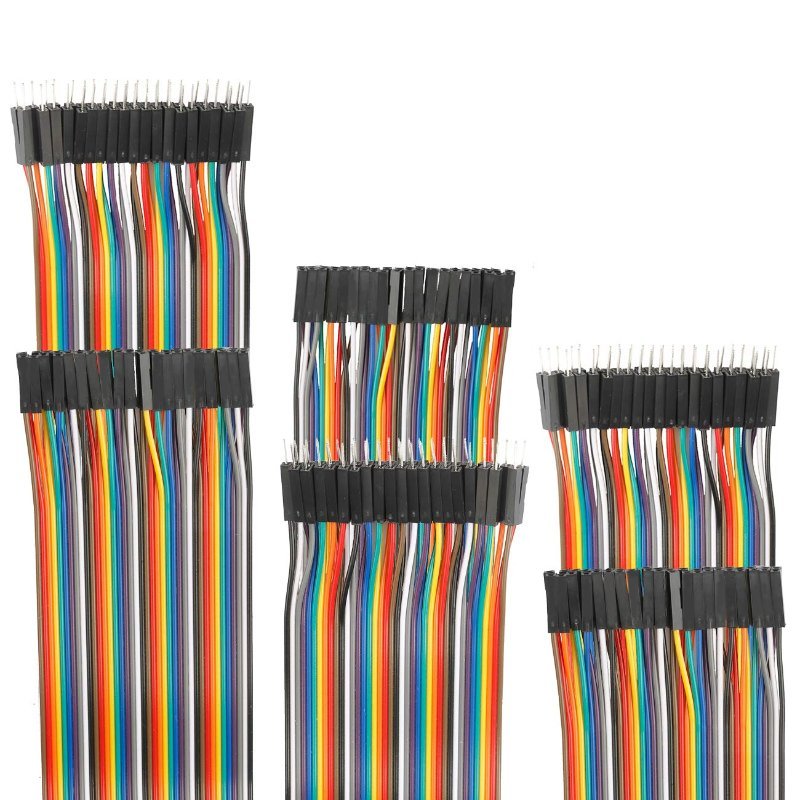
Pure copper, nickel-plated brass terminals, 15.7″ reach for off-board sensors and chassis-mounted parts.
Check Price on Amazon →What I would skip
Unspecified bulk bags. If a listing does not name the conductor material or the gauge, assume CCA and thin. The savings is about three dollars and the cost is an intermittent fault you will chase for an hour.
Single-gender packs, unless you already own an assortment and are topping up a specific type you burn through. Buying 120 male-to-male wires as your first set is a rite of passage nobody enjoys.
Anything advertising itself as “for breadboard” with stranded bare ends. Stranded wire and breadboard clips do not get along, and no price makes that work.
Making a set last
Four habits, all cheap. Pull the housing, never the wire — every time you yank the cable itself you are stressing the crimp, and that is what eventually fails. Pull straight up, not at an angle, which spreads breadboard clips. Retire suspect wires immediately rather than dropping them back in the bag to sabotage a future project. And keep color discipline: red for 5V or 3.3V, black for ground, and pick one other color you always use for a shared signal. It feels fussy for a three-wire circuit and it saves you the entire debugging session on a twenty-wire one — particularly when you have both 5V and 3.3V parts on the same board, where a mixed-up rail can actually damage something (here is why that matters).
None of this is expensive. All three kits together cost less than a single sensor breakout, and they will outlast several projects — which is the point. Jumper wires should be the part of your bench you never have to think about.