Every summer the same ritual plays out: you leave for a week, you ask a neighbor to water the plants, and you come home to either a swamp or a graveyard. The fix is one of the oldest and most satisfying Arduino projects there is — a soil moisture sensor, a relay, and a little submersible pump that waters the plant only when the soil actually needs it. It is also one of the few beginner builds that keeps doing a real job long after the novelty wears off.
This isn’t a hypothetical, either. There are dozens of documented versions of this build in the wild — one of the better ones is an open-source watering system on GitHub by a maker named mchlbrnhrd, built around exactly the kind of four-plant irrigation kit we’ll get to below, with per-plant calibration and moisture thresholds handled in firmware. The general pattern is so well proven at this point that the hardware side has been reduced to a commodity kit. Your job is mostly wiring, calibrating, and not making the handful of mistakes that sink most first attempts.
How the whole thing works
The logic loop is almost embarrassingly simple. A soil moisture sensor sits in the pot and produces a voltage that changes with how wet the soil is. The Arduino reads that voltage on an analog pin — if analog inputs are still fuzzy for you, our digital vs. analog pins explainer covers exactly what analogRead() is doing when it hands you a number from 0 to 1023. When that number crosses your “too dry” threshold, the Arduino switches on a relay, the relay powers a small submersible pump sitting in a water reservoir, and water runs through vinyl tubing to the pot. A few seconds later the pump shuts off, the soil drinks it in, and the loop starts over.
Two of those components deserve a proper explanation. The relay is an electrically controlled switch: a tiny current from an Arduino pin energizes a coil, and that coil physically closes a separate, isolated contact that carries the pump’s power. That isolation matters — the pump’s motor draws far more current than an Arduino pin can safely supply, so the relay lets a 20-milliamp signal control a load that would otherwise cook the board. Wire the pump through the relay’s NO (normally open) terminal, so the pump defaults to off if anything resets or loses power. The failure mode you want is a thirsty plant, not a flooded shelf.
Why the sensor type matters more than the board
The other component worth understanding is the sensor, because this is where cheap builds die. Old-style resistive moisture sensors work by passing current directly through the soil between two exposed metal probes and measuring the resistance. Wet soil conducts better, dry soil worse. The problem is electrolysis: running current through damp soil steadily corrodes the exposed metal, and within weeks the readings drift, then fail entirely. For a build whose entire purpose is running unattended, that’s disqualifying.
Capacitive sensors solve this by never exposing metal to the soil at all. The probe is a coated PCB that measures how the soil’s moisture changes the capacitance around it — water has a much higher dielectric constant than dry soil, so wetter soil shifts the reading. No current through the soil, no corrosion, and readings that stay stable for months. They run happily on 3.3V or 5V and output a simple analog voltage. This is the one spec you should refuse to compromise on.
The kit that covers the whole build
This post contains affiliate links. If you buy through them, this site earns a commission at no extra cost to you.
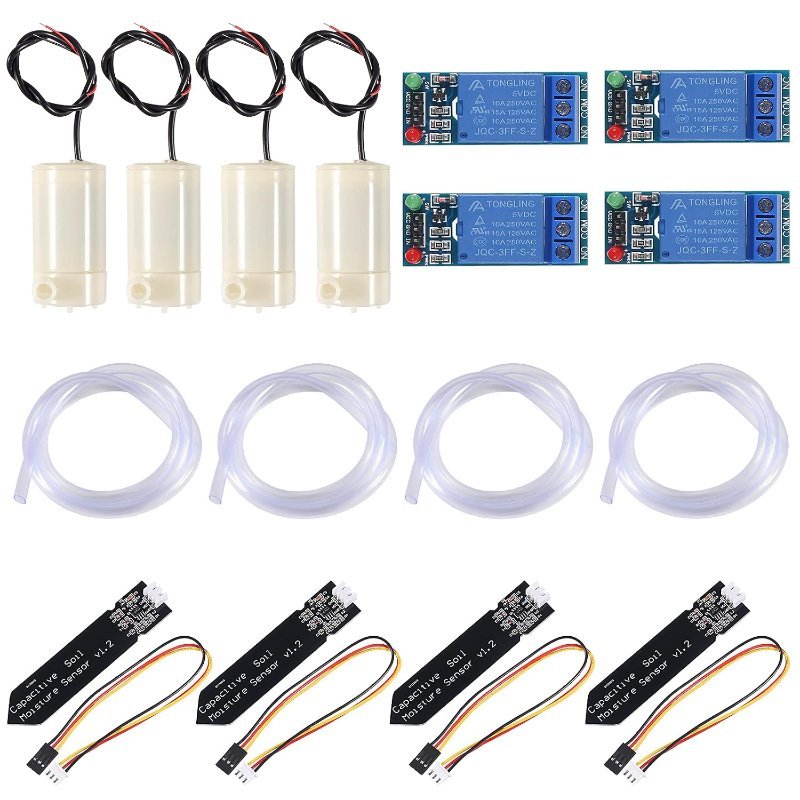
You can source every part separately, but there’s no reason to. The ALMOCN irrigation kit bundles four capacitive soil moisture sensors, four single-channel 5V relay modules, four small submersible pumps, and four lengths of vinyl tubing — enough to put four separate plants on their own independent watering loops from one Arduino, since each sensor only needs its own analog pin and each relay a digital pin. The sensors are the coated capacitive type described above, the relays have the standard optocoupler-and-screw-terminal layout, and the pumps are the 3–5V submersible style that pushes water up a foot or two of tubing without complaint. Add an Uno and a water container and the parts list is done.
Four capacitive sensors, four relays, four pumps, and tubing — the complete hardware side of a four-plant self-watering system in one box.
Check Price on Amazon →analogRead() value with the sensor in open air, then in a glass of water. Those two numbers are your full scale — your “water now” threshold lives between them, and every sensor’s numbers differ slightly. Once that works, add a DS3231 real-time clock module and only allow watering in the early morning — plants prefer it, and it stops the pump from cycling at 2 a.m. every time the sensor wobbles past the threshold.The details that decide whether it survives your vacation
The electronics are the easy half. What separates a system that works for a demo from one that works for ten unattended days is a handful of unglamorous details. First, pump in short bursts: run it for three to five seconds, then wait a few minutes before re-checking the sensor. Water takes time to percolate down to probe depth, and a naive “pump until wet” loop will empty your reservoir into one pot before the sensor ever notices. Second, add a maximum daily runtime in code — if the pump has already run, say, 60 seconds today, lock it out. That single guard turns a sensor failure into a dry plant instead of a flood. Third, size the reservoir honestly: a typical houseplant might take 100–200 ml per watering, so do the math for your trip length and then double it. Finally, keep the pump fully submerged — these little pumps aren’t self-priming, and one that sucks air will happily buzz away delivering nothing.
Get those four details right and this build crosses the line from “cute Arduino demo” to genuinely dependable infrastructure. It’s a weekend of work, most of which is calibration and tube-routing rather than code — and it beats asking the neighbor.