A soldering iron and a soldering kit are two different purchases, and the gap between them is where beginners lose money. An iron is a heating element with a handle. A kit is that same iron surrounded by fifteen or twenty accessories chosen largely to make the listing photo look full. Some of those accessories you will touch every single session. Several of them are a two-dollar pair of tweezers and a zippered case.
I have already gone through the irons themselves, so if you want a bare tool and intend to source your own consumables, start there. This post is about the bundles, because for most people picking up a soldering iron for the first time a bundle really is the right call. You do not yet know which tip shape you prefer, you do not own a stand, and you should not have to place four separate orders before you can attach a header strip to your first perfboard. The job is knowing which parts of the bundle are load-bearing and which are packing material.
What “21-in-1” is actually counting
Kit listings compete on item count, and the count is padded on purpose. Sort any kit’s contents into three buckets and the picture clarifies fast.
Things that get hot: the iron and its tips. This is 80 percent of what you are paying for and the only part that is hard to upgrade piecemeal later. Things that hold things: the stand, the helping-hands clips, the tip cleaner, the tweezers. Boring, cheap, and genuinely necessary — a hot iron without a stand is how workbenches get scorched. Things that will sit in the case forever: the mini screwdriver set, the roll of assorted heat-shrink, the tiny wire stripper, the “PCB” that is a bare square of fiberglass. None of it is bad. None of it is a reason to choose one kit over another.
So when two kits are twenty dollars apart and one advertises six more pieces, the extra pieces are almost never the reason for the price difference. The iron is.
Temperature control is the whole ballgame
Solder is an alloy with a specific melting point. Standard 60/40 tin-lead melts across roughly 183 to 190°C. The related 63/37 blend is eutectic, meaning it has no mushy in-between state at all — it goes from solid to liquid at a single temperature, 183°C, and back again just as sharply. Lead-free SAC305 (tin, silver, copper) does not melt until about 217 to 220°C. That 35-degree spread is why leaded and lead-free are not interchangeable habits.
Your iron tip runs far hotter than any of those numbers — typically 315 to 370°C (600 to 700°F) for leaded solder, and 340 to 400°C for lead-free. The reason is that you are not melting solder with the tip. You are heating the joint — the pad and the component lead — until the joint itself is hot enough to melt solder fed into it. Solder that melts against the iron instead of against the pad produces a cold joint: dull, grainy, blobby, and mechanically weak. It will pass a visual glance and fail a month later.
A fixed-wattage iron with no readout gives you exactly one temperature — whatever that element happens to settle at — and no way to tell when it has drifted. Any kit under consideration needs a real adjustable setpoint with a display. This is the single specification I would not compromise on, and it is the thing that separates a fifteen-dollar kit from a thirty-dollar one.
Wattage is about recovery, not maximum heat
People read 60W versus 110W as “how hot it gets.” It is not. Both irons reach the same setpoint. Wattage determines thermal recovery — how quickly the element replaces heat that just got sucked out of the tip.
That matters because copper is very good at moving heat away from where you want it. Touch a thin signal pad on a small breakout board and a 60W pen is fine. Touch a ground plane, a chunky barrel jack, or a thick stranded wire and that same pen sags: the tip temperature crashes, you sit there waiting, and while you wait you are cooking the component you are trying to attach. Longer contact time at a lower temperature does more damage than a brief touch at the correct one.
For breadboard-graduation work — headers, LEDs, resistors, moving a circuit onto perfboard — 60W is genuinely enough. If you can already see yourself soldering battery leads or motor terminals, buy the recovery headroom now.
The solder in the box is usually the weak link
Nearly every kit includes a small spool, and it is nearly always the cheapest component in the bundle. That matters more than it sounds, because solder is not just metal — it is metal wrapped around a core of flux, a chemical that strips the oxide layer off copper the instant it gets hot. Without active flux, molten solder beads up on the pad like water on a waxed car instead of wetting it and flowing into the joint.
When a beginner concludes they are bad at soldering, tired flux in bargain solder is one of the most common actual causes. Good solder makes joints form almost by themselves. This is the cheapest possible upgrade to your results, which is why one of my three picks below is not a kit at all.
The picks
This post contains affiliate links. If you buy through them, this site earns a commission at no extra cost to you.
Budget. If you want the smallest sensible amount of money that still buys a controllable iron, this is the shape of kit to look for: 60W, a digital readout with an adjustable range of roughly 200 to 500°C, five swappable tips, a stand, a desoldering pump, tweezers, and a case to keep it all in one place. Crucially, the included solder here is flux-cored tin-lead rather than the hard-to-work lead-free wire that gets bundled at this price. It is a pen-style iron, not a station, so the temperature electronics live in the handle — slightly more front-heavy, and no separate base to park on the bench. For learning on small boards it does the job without pretending otherwise.
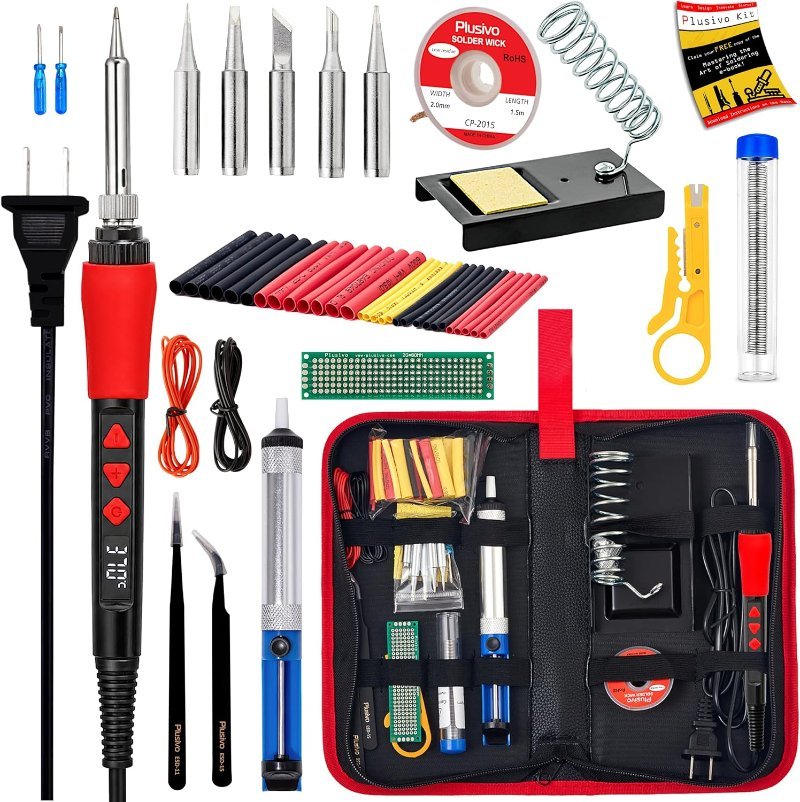
Adjustable 200-500°C with an LED readout, five replaceable tips, desoldering pump, stand, tweezers and flux-cored solder in a zip case. The cheapest version of “controllable” worth owning.
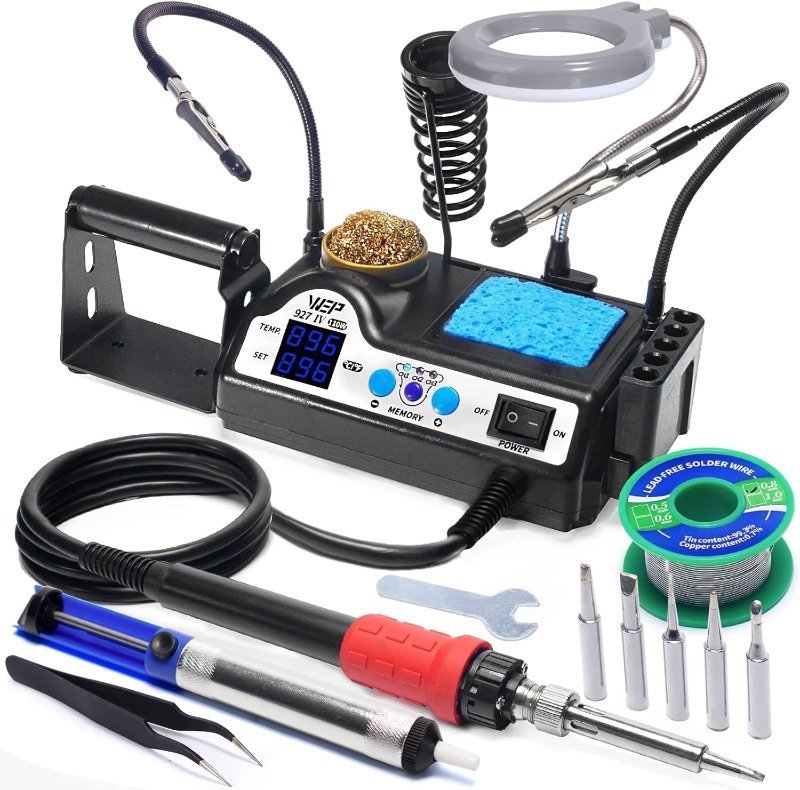
Check Price on Amazon →Best overall. Step up to a proper station and two things change. The heavy electronics move off your hand and into a base, so the iron itself becomes a light pencil you can hold properly, and the 110W element stops sagging on big joints. This one also folds the accessories that normally get scattered across a bench — helping-hands arms, a lit magnifier, a solder wire dispenser, tip storage, a tip cleaner — into the station body, which matters more than it sounds if your workbench is also your dining table. The three preset channels are the underrated feature: park one at your leaded temperature, one for lead-free, one hot for heavy joints, and stop re-dialing every time you switch tasks. It runs 90 to 480°C and shows set and actual temperature side by side, so you can see the recovery happening instead of guessing.
110W with real thermal recovery, dual set/actual temperature display, three preset channels, sleep mode, plus integrated helping hands, LED magnifier, five spare tips and tip storage. The kit that stays useful after you stop being a beginner.
Check Price on Amazon →The upgrade every kit needs. Whichever kit you buy, put its bundled spool in a drawer and solder with this instead. Kester 44 in 63/37 is the eutectic alloy discussed above, so it sets instantly with no pasty window in which a nudge turns a good joint into a cracked one, and its RMA rosin core is active enough that solder flows into a joint rather than sitting on top of it. The 0.031-inch diameter is the right general-purpose gauge for through-hole work — thin enough to meter carefully onto a small pad, thick enough that you are not feeding wire forever on a big one. It costs a few dollars and it will change your joints more than a fifty-dollar iron upgrade would.
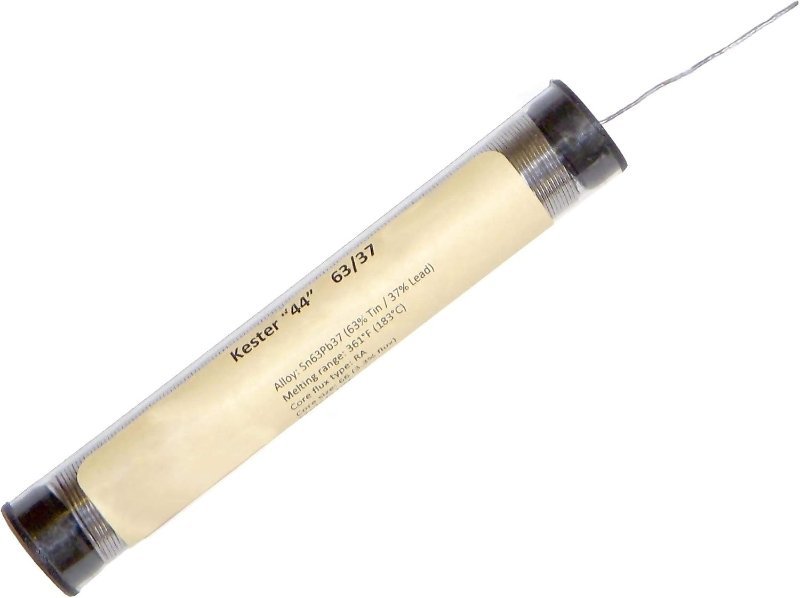
Eutectic 63/37 with an RMA rosin core that actually wets. The cheapest thing on this page and the one most likely to fix joints you were blaming on your technique.
Check Price on Amazon →What no kit puts in the box
Two safety items, neither of which ships with anything. First, ventilation: the smoke coming off a joint is vaporized rosin flux, not lead, and it is a known respiratory irritant. Crack a window and put a small fan beside the bench blowing the plume away from your face. Second, if you use leaded solder — and for hand work, you should — wash your hands when you are done and keep food and drink off the bench. Those two habits cost nothing and are the entirety of soldering safety for a hobbyist.
The practical item kits also skip is a decent pair of flush cutters for trimming leads after the joint sets. The mini snips bundled in a kit will crush a lead rather than shear it, which stresses the joint you just made.
One last thing worth saying plainly: buying a soldering kit does not mean you should start soldering everything. Prototyping belongs on a breadboard, and knowing when to stop breadboarding is its own decision — if you are not sure your circuit is finished, read breadboard vs. perfboard vs. PCB before you commit anything to solder. Soldering is what you do after the circuit works.