You hit the arrow button, the IDE compiles fine, and then the console turns orange and nothing happens to your board. This is the single most common wall beginners hit, and the good news is that the cause is almost never exotic. In something like nine cases out of ten it is one of six boring things, and you can work through all of them in about four minutes if you go in the right order.
The bad news is that the Arduino IDE is genuinely unhelpful about telling you which one it is. Compiling and uploading are two completely separate steps, and the error text you get back comes from avrdude, a command-line tool the IDE shells out to. It reports what it saw on the serial port, not what you did wrong. So the first move is to stop reading the error as an instruction and start reading it as a clue.
First: which half of the error is talking?
Turn on verbose upload output (File → Preferences → Show verbose output during: upload) before you troubleshoot anything. Then sort the message into one of two buckets. If it says something about the port not existing, being busy, or access being denied, the IDE never even opened a connection — that is a driver, cable, or port problem. If it says programmer is not responding or not in sync: resp=0x00, the port opened fine and the IDE talked into it, but nothing on the other end answered in the language it expected. That is a board, bootloader, or wiring problem. Those are two different lists of fixes, and mixing them up is why people spend an hour reinstalling drivers for a problem that was a jumper wire.
The stk500_recv() family of errors is common enough that it has its own walkthrough here. If that is your exact error, start there. Everything below covers the wider set.
1. No port is listed at all
Open Tools → Port. If the menu is empty or your board is not in it, your computer does not know the board exists, and no amount of code changes will help. On a genuine Uno the USB-to-serial conversion is handled by a second ATmega16U2 chip that presents itself as a standard USB device, so it usually just appears. Almost every clone under $15 instead uses a CH340 (sometimes CH340G or CH341) chip, and Windows does not ship a driver for it. Install the CH340 driver from WCH, unplug the board, plug it back in, and the port shows up. On modern macOS the CH340 driver is built in, but a leftover third-party driver from an old install can fight with it — if you have one of those, remove it rather than adding another.
2. Your cable is a charging cable
This one wastes more beginner hours than every software issue combined, and the tell is cruel: the board powers up, the ON LED glows, the pin 13 LED blinks the old sketch, and it looks completely alive. But plenty of cheap USB cables — especially ones that shipped with a battery pack or a shaver — only have the two power conductors wired and skip the data pair entirely. Power flows, data does not, and no port ever enumerates. If your port list is empty and the driver is definitely installed, swap the cable before you touch anything else. Borrow one you have actually moved files over.
This post contains affiliate links. If you buy through them, this site earns a commission at no extra cost to you.
It is worth owning one cable you trust and keeping it with the board rather than in the drawer of mystery cables. For an Uno or a Mega you want USB-A to USB-B, the square printer-style connector. The Amazon Basics one is unremarkable in the best way: it is a real data cable, it is cheap, and it removes the variable permanently.
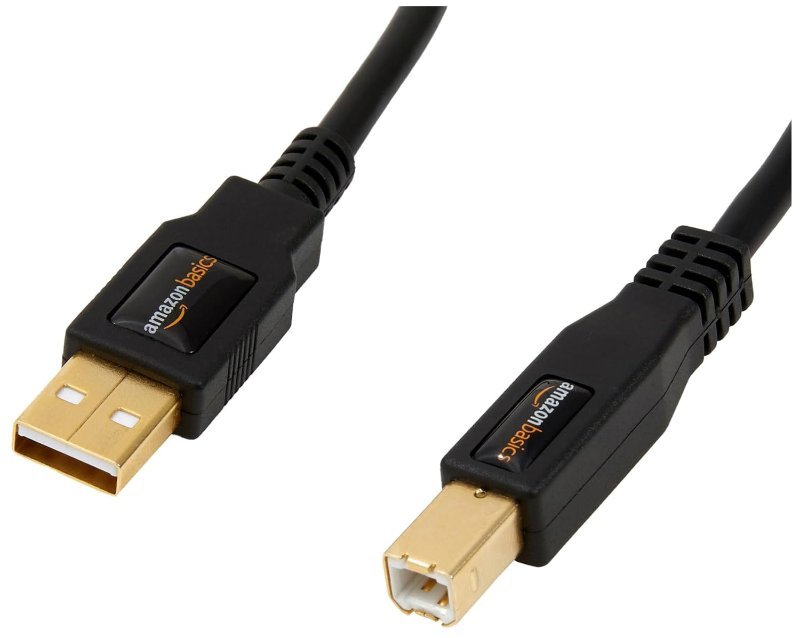
A known-good data cable for the Uno and Mega. Not exciting, but a cable you have verified is the fastest way to eliminate the most common false alarm in Arduino troubleshooting.
Check Price on Amazon →3. Wrong board selected — or on a Nano, the wrong bootloader
Tools → Board has to match the chip you are actually holding. Uploading an Uno sketch to a Nano gets you an immediate sync failure, because the bootloader on each expects a different serial speed. The Uno bootloader listens at 115200 baud; the older Nano bootloader listens at 57600. Baud rate is just the speed both sides agree to send bits at, and if they disagree the incoming data is unreadable garbage rather than a recognizable handshake.
The Nano deserves its own warning. Under Tools there is a Processor submenu with both “ATmega328P” and “ATmega328P (Old Bootloader)”. Nanos manufactured before 2018, and a large share of the clones still being sold today, need the Old Bootloader option. If your Nano fails to upload with a sync error and everything else looks right, flip that setting and try again — it fixes this constantly, and it is not something anyone would guess at.
4. You have something wired to pins 0 and 1
On an Uno, digital pins 0 and 1 are not ordinary pins. They are RX and TX, the same two lines the USB-serial chip uses to talk to the microcontroller. If you have a Bluetooth module, a GPS, or even a stray jumper sitting on them, that device is shouting over the upload conversation. The sketch fails to transfer and the error looks identical to a dead board. Pull anything off 0 and 1, upload, then put it back. If you need a second serial device permanently, use SoftwareSerial on other pins, or move to a Mega, which has four hardware serial ports.
5. Something else already has the port open
A serial port can only be held by one program at a time. A Serial Monitor left open in a second IDE window, a plotter, a Python script from an earlier experiment, or Processing will all lock it, and the upload fails with an access-denied or busy message. Close everything else that touches the port. On Windows this also covers the surprisingly common case of a phone-sync or printer utility grabbing a low COM number.
6. Permissions, if you are on Linux
The port appears as /dev/ttyUSB0 or /dev/ttyACM0, and by default your user account is not allowed to write to it. Run sudo usermod -a -G dialout $USER, then log out and back in — the group membership does not apply to an already-running session. Do not solve this by running the IDE as root; it works, and then every sketch folder you create is owned by root and you get to debug that instead.
7. Native-USB boards need a manual bootloader nudge
The Uno R3 resets itself automatically when an upload starts: the DTR line from the USB-serial chip runs through a small capacitor to the RESET pin, so opening the port pulses reset and the bootloader wakes up. Boards with native USB — the Leonardo, the Micro, the Uno R4, most ESP32 dev boards — do not always manage this cleanly, especially if the sketch currently on the board crashed or is sleeping. The fix is to press RESET twice quickly right as the upload begins. On an ESP32 you may instead need to hold the BOOT button while upload starts. The port will briefly change identity when this works, which is normal.
When the bootloader is actually gone
If you have been through all seven and the board still refuses, the last real possibility is that the bootloader itself is missing or corrupted. This happens on boards that shipped blank, on bare ATmega328P chips you bought loose, and occasionally after a failed upload at exactly the wrong moment. The bootloader is a tiny program that lives in protected flash and does nothing except listen for new code at power-on. Without it, the USB path is dead no matter what you plug in, because there is nothing on the chip willing to have that conversation.
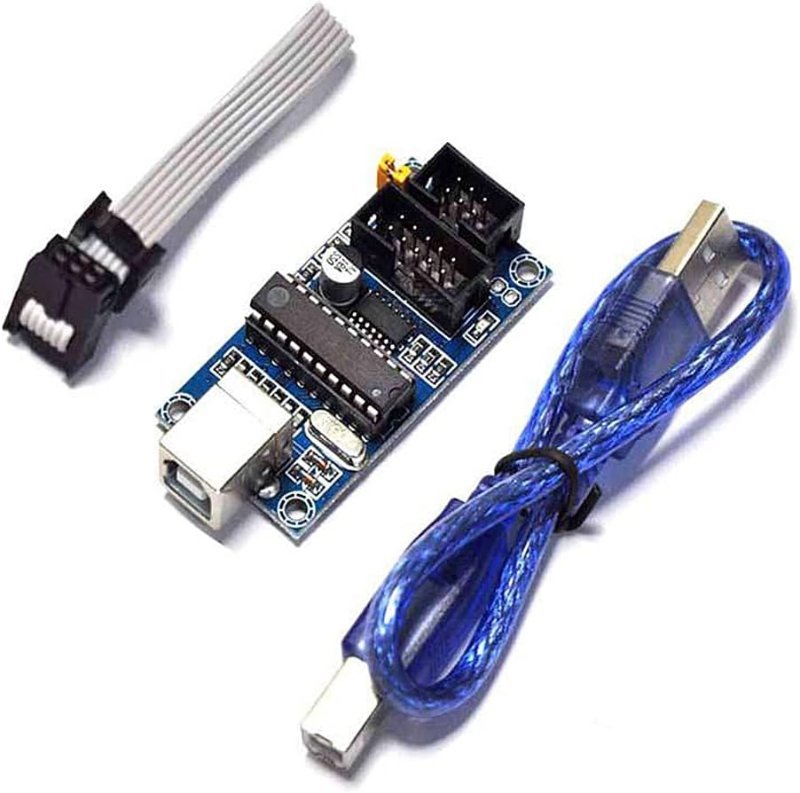
Fixing it requires writing directly to the chip over ISP (in-system programming), which bypasses serial entirely. You can do this with a second Arduino running the ArduinoISP sketch, but a dedicated programmer is faster, does not tie up a board, and is listed natively in the IDE under Tools → Programmer, so Burn Bootloader just works. A USBtinyISP is the standard cheap one and is worth having in the drawer the first time you brick something.
Writes a fresh bootloader straight to the chip over the ICSP header when serial uploads are impossible. Recognized by the Arduino IDE out of the box, and it ships with the 10-pin to 6-pin adapter you will need for standard Arduino headers.
Check Price on Amazon →The order to actually check things in
Work cheapest-first, because the cheap checks are also the likeliest. Is a port listed? If not, it is the driver or the cable. If a port is listed, is the right one selected, and does the board match — including the Nano processor variant? Then strip pins 0 and 1 bare, close every other program touching the port, and try again. Only after all of that is it worth suspecting the bootloader. Resist the urge to reinstall the IDE; in the entire list above, exactly zero of these problems are fixed by reinstalling the IDE, and it costs you twenty minutes you could have spent swapping a cable.