Search “ESP32 dev board” and you get a wall of near-identical blue rectangles, most of them sold in three-packs by brands you have never heard of, all promising WiFi and Bluetooth for about six dollars a board. It is one of the worst shopping experiences in hobby electronics, because the differences that actually matter are almost never in the product title. Which silicon is under the metal can? How many pins are broken out, and are they pins you can safely use? Does the antenna work? Here is how to sort the pile, and the three boards that earn desk space.
“ESP32” is a family, not a board
Three layers are getting collapsed into one word. The SoC is the chip itself — ESP32, ESP32-S3, ESP32-C3, and so on. The module is that chip plus flash memory, a crystal, and an antenna, sealed under the metal shield and stamped with a name like ESP32-WROOM-32. The dev board is the module soldered to a PCB with pin headers, a USB port, and a 3.3V regulator. When someone says “I bought an ESP32,” they mean the third thing, and they have told you almost nothing about the first.
The three worth knowing: the original ESP32 (dual-core Xtensa LX6, up to 240 MHz) is the one every tutorial on the internet was written for. The ESP32-S3 is dual-core Xtensa LX7 with a native USB peripheral and support for large external PSRAM. The ESP32-C3 is a single-core RISC-V part at 160 MHz — cheaper, smaller, less capable, and perfectly adequate for a sensor that reports a number once a minute. All of them run 3.3V logic, which is the single most common way people destroy them; if that is new to you, read 5V vs. 3.3V logic levels before you wire anything to an Arduino shield.
The 30-pin vs. 38-pin trap
Classic ESP32 boards come in two header layouts, and listings treat the 38-pin as the obvious upgrade. It mostly is not. The 30-pin board breaks out roughly 25 usable GPIO. The 38-pin adds eight more — and six of those are GPIO6 through GPIO11, which are hardwired to the SPI flash chip the board boots from. Pull one of those low and the board stops booting. They are broken out because the module has the pads, not because you are meant to use them.
So the real difference is two extra usable pins and a slightly different footprint. Buy the 38-pin if you have counted your I/O and genuinely need it. Otherwise the 30-pin is narrower, fits a breadboard with a row free on each side, and gives you fewer opportunities to brick something.
The board most people should actually buy
This post contains affiliate links. If you buy through them, this site earns a commission at no extra cost to you.
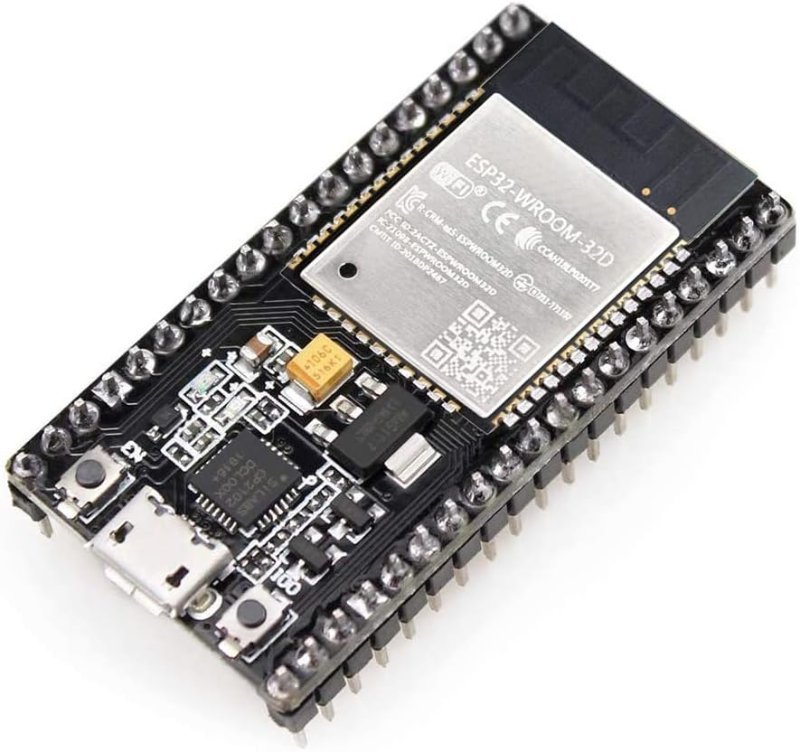
The plain ESP-WROOM-32 board wins on documentation, not specs. Every pinout diagram, every library example, every half-finished forum thread from 2019 that finally answers your question — they all assume this board. When something goes wrong at 11pm, that ecosystem is worth more than an extra core. HiLetgo’s version has an integrated PCB antenna with an RF amplifier and filter, a USB-to-UART bridge that Windows and macOS both handle without hunting for drivers, and about 1,600 ratings behind it, which for a generic-looking blue board is unusual reassurance.
Dual-core 240 MHz, 2.4 GHz WiFi plus Bluetooth, integrated antenna with RF amp and filter. The board every ESP32 tutorial was written against — which is exactly why it is the one to learn on.
Check Price on Amazon →setup(), then print WiFi.RSSI() to the display in a loop. RSSI is received signal strength in dBm, so it reads as a negative number: around -50 is excellent, -80 is barely hanging on. Now walk around the house with the board on a USB battery and watch the number move. You have just built a WiFi survey tool out of two parts, and you will find dead spots you did not know about.
When the S3 is worth the upgrade
The ESP32-S3 earns its place when you run out of memory or you want the USB port to do something interesting. The N16R8 variant carries 16MB of flash and 8MB of PSRAM — pseudo-static RAM, extra memory sitting outside the chip’s own 512KB of SRAM. That matters the moment you buffer a camera frame, drive a color display, or hold an audio sample in memory, which are precisely the projects where a classic ESP32 throws a heap allocation failure and reboots in a loop.
The other draw is native USB. Classic ESP32 boards talk to your computer through a separate serial bridge chip; the S3 has USB built into the silicon, so the board itself can enumerate as a keyboard, a mouse, or a mass storage device. The tradeoff is maturity — plenty of libraries and tutorials still assume the classic pinout, so you will spend more time mapping pins yourself. Buy this as a second board, not a first one.
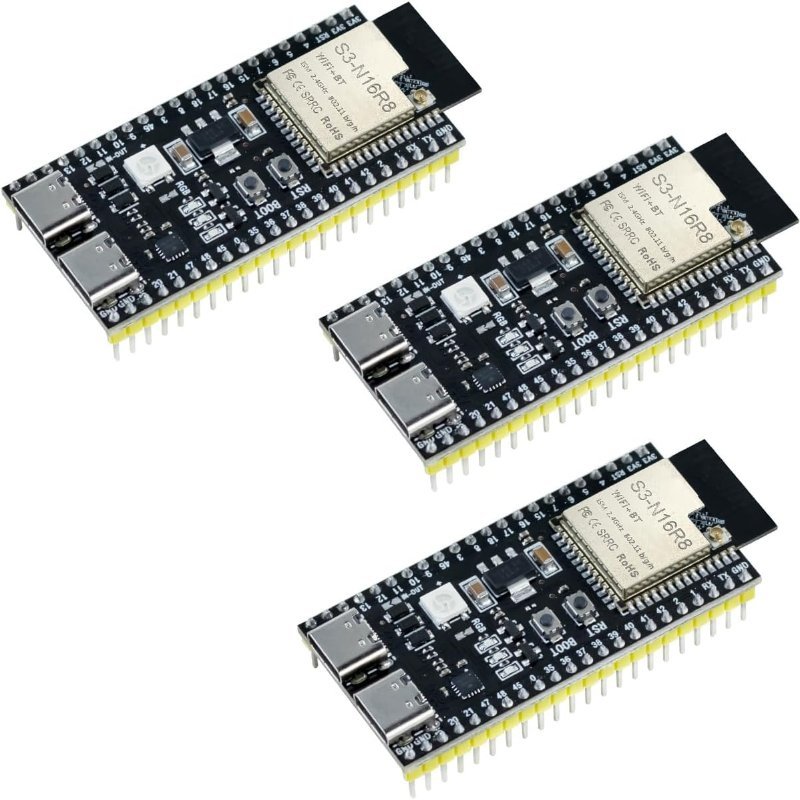
ESP32-S3-WROOM-1 module, 16MB flash and 8MB PSRAM, native USB over Type-C. The one to reach for when a project involves a display, a camera, or audio and the classic ESP32 keeps running out of room.
Check Price on Amazon →The C3 SuperMini: tempting, with an asterisk
The C3 SuperMini is thumbnail-sized, costs almost nothing, and gives you a single RISC-V core at 160 MHz with about eleven usable GPIO. For a battery-powered node that reads one sensor and pushes a number somewhere, the form factor is legitimately delightful — it disappears into an enclosure in a way a 30-pin board never will.
The asterisk is the antenna. On the common SuperMini layout the PCB antenna sits too close to the ground plane and the board skips the clearance and tuning stripline the module’s datasheet calls for, so the board partially interferes with itself. In practice that means noticeably worse range than a WROOM board sitting in the same spot. Soldering a 31mm quarter-wave wire to the feed pad recovers a lot of it, and external-antenna variants exist. Go in knowing that, and it is a fine little board; go in expecting WROOM-class range and you will spend an evening blaming your router.
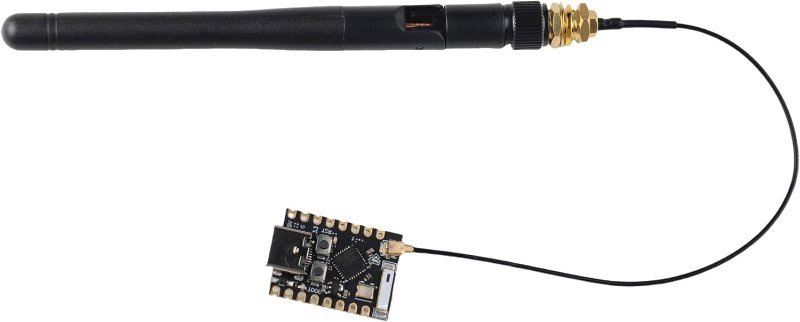
Single-core RISC-V at 160 MHz, WiFi and BLE, roughly the size of a thumbnail. Great for one-sensor nodes that need to vanish into a small enclosure — just budget for the antenna compromise.
Check Price on Amazon →Three pin gotchas that are never in the listing
ADC2 stops working when WiFi is on. The classic ESP32 has two analog-to-digital converters, and ADC2 shares internal circuitry with the WiFi radio. Turn on WiFi and ADC2 reads garbage or fails silently — no error, just wrong numbers. If your project uses WiFi, put every analog sensor on an ADC1 pin (GPIO32 through GPIO39).
GPIO34 through GPIO39 are input-only. They physically lack output driver circuitry and have no software-selectable pullup or pulldown resistors. Perfect for reading a sensor, useless for driving an LED, and no amount of code will change that.
Some pins decide how the chip boots. GPIO0, 2, 5, 12, and 15 are strapping pins — the chip samples their voltage at reset to choose a boot mode. Hang something on one that holds it in the wrong state and the board will not start. Nothing on the silkscreen warns you.
What I would actually buy
Start with a 30-pin ESP-WROOM-32. It is cheap enough that a mistake costs less than lunch, and the volume of documentation behind it turns most problems into a five-minute search instead of a lost evening. Add an S3 when a specific project demands PSRAM or native USB — not before. Add a C3 SuperMini when you need something small and you have made peace with the antenna. Skip the 38-pin boards unless you can name the two extra pins you need and explain why the other six are off-limits.