The chassis is the part of a beginner robot that nobody researches and everybody regrets. You spend a week reading about boards and sensors, then grab whatever $14 acrylic car kit shows up first, and three weekends later you’re drilling holes in a plate that was never meant to hold an ultrasonic bracket. The chassis decides how much room you have, how much weight you can carry, whether your robot can climb over a rug, and how many times you’ll take the whole thing apart to get at a wire.
So here’s the short version before the long one: for most people building their first Arduino robot, a 4WD kit with a rigid PCB deck is the right buy, not the cheapest 2WD acrylic car. The 2WD kit is still a fine choice for one specific reason, and a tracked metal chassis is worth it for another. Below is what actually separates them.
What you’re really choosing between
Nearly every beginner chassis on Amazon uses the same motor: the TT gear motor, a yellow plastic gearbox with a 1:48 reduction ratio. “1:48” means the internal gear train turns the wheel once for every 48 turns of the motor itself — you trade speed for torque, which is exactly the trade a slow, heavy little robot wants. Spec-wise these run on 3–6V, spin around 90 RPM at 3V and roughly 200 RPM at 6V, draw about 70 mA under light load, and stall at around 0.8 kg·cm of torque. They are not precision hardware. Two of them will never spin at exactly the same rate, which is why a 2WD robot commanded to drive “straight” curves gently to one side.
Since the motors are basically a constant, the real differences come down to three things: deck material (acrylic, PCB fiberglass, or aluminum), drive layout (2WD with a caster, 4WD, or tracks), and mounting real estate — how many holes and how much flat area you get for the board, driver, battery pack, and sensors you haven’t bought yet.
Deck material matters more than it sounds. Acrylic is cheap and easy to cut, but it’s brittle: overtighten a standoff and you’ll crack it, and a robot that drives off a table edge once tends to come back in pieces. PCB-grade fiberglass — the same stuff circuit boards are made of — flexes instead of shattering. Aluminum is effectively indestructible and adds weight, which sounds bad but actually improves traction on carpet and inclines.
Drive layout is the other fork in the road. A 2WD chassis uses two driven wheels plus a free-spinning caster or ball wheel, which makes it pivot beautifully in place and cost almost nothing. A 4WD chassis drives all four wheels off a single motor driver (you wire the two left motors in parallel and the two right motors in parallel — you are not steering them independently), so it gets meaningfully better grip and climbs over thresholds and cable bumps that stop a 2WD car cold. The cost is current draw: four motors instead of two roughly doubles what your battery pack and driver have to supply.
The picks
This post contains affiliate links. If you buy through them, this site earns a commission at no extra cost to you.
Budget: a 2WD kit, but only because it ships encoder discs
The classic $14 two-wheel acrylic kit gets recommended to death, and most of the time it’s the wrong call — but this particular one earns its place because it includes speed encoder discs: slotted plastic wheels that slip onto the motor’s second output shaft. Those discs are the gateway to closed-loop control, where your robot measures what the wheels actually did instead of assuming the motors obeyed. That’s the fix for the “drives straight, curves left” problem, and it’s a genuinely valuable thing to learn on. It’s a 48:1 TT motor pair, a two-layer acrylic deck with a grid of mounting holes, and a 4×AA battery box. Buy this one if your goal is learning motor control, not carrying payload.
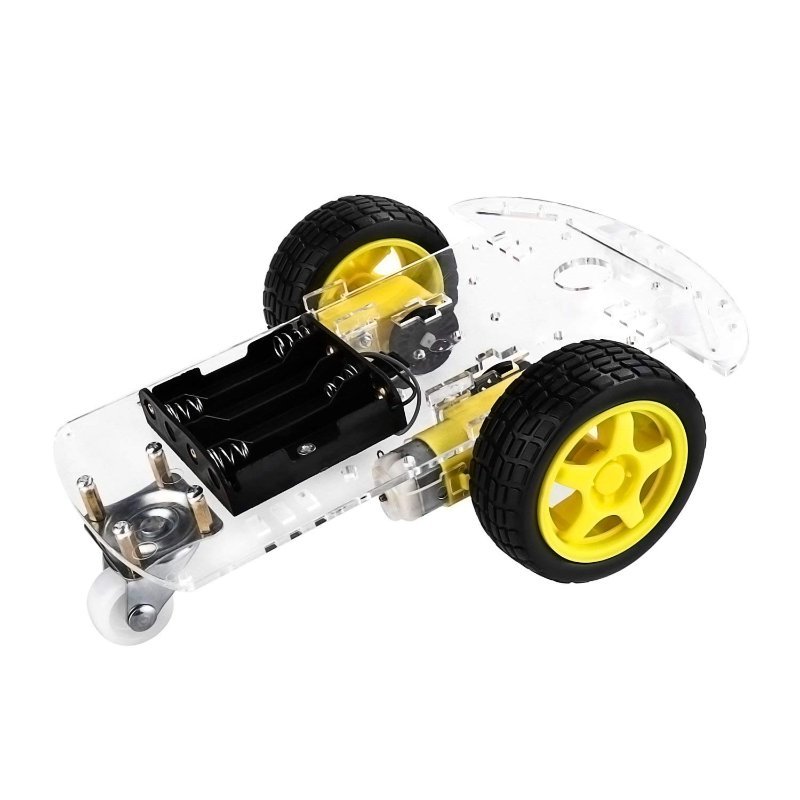
Two 48:1 TT gear motors, encoder discs, acrylic deck, and a battery box. The cheapest honest way into robot motion control.
Check Price on Amazon →attachInterrupt() to count pulses — now print the left and right counts side by side while driving “straight.” Watching those two numbers drift apart is the most useful five minutes in beginner robotics.
Sweet spot: 4WD on a PCB deck
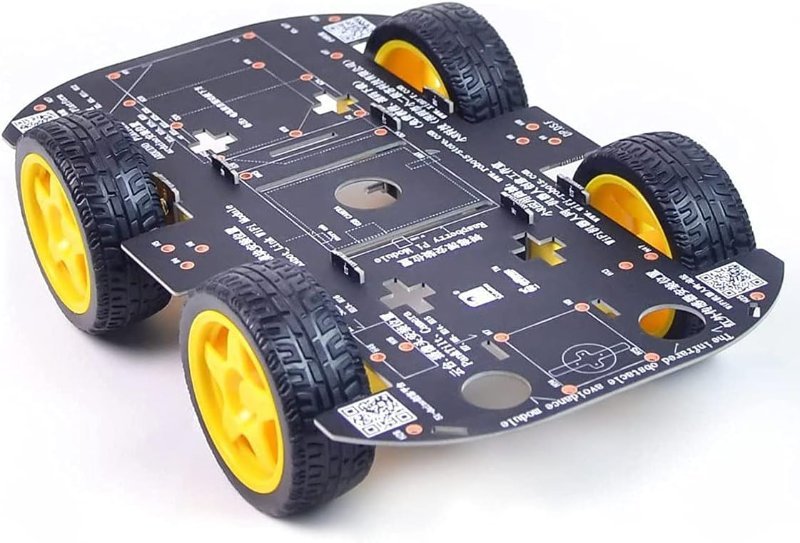
This is the one I’d hand to someone starting today. It’s four TT motors on a single 256 × 150 mm PCB-material deck — big enough that an Uno, an L298N driver, a battery pack, and a servo-mounted sensor all fit without stacking, and rigid enough that it survives the drops that crack acrylic. The 500 g rated payload is the number that matters: a 2WD acrylic car starts sagging and slipping well before that, and payload is what you run out of the moment you add a second battery or a camera. Rubber tires with sponge inserts give it a flat, wide contact patch, so it actually grips carpet. Wire the left pair together and the right pair together into one dual H-bridge and it drives exactly like a 2WD car with twice the traction.
Four TT motors, a 256 × 150 mm PCB deck, 500 g payload, and enough flat area for every module you will add later.
Check Price on Amazon →Splurge: an aluminum tracked chassis
Tracks are not just for looks. Spreading the robot’s weight across a long contact patch is what lets it cross gravel, grass, door thresholds, and thick carpet that beach a wheeled car — and a tank steers by running its two track sets at different speeds, so the control code is identical to a 2WD robot. The aluminum frame means you can bolt a Raspberry Pi, a Jetson Nano, and a pan-tilt camera on top without the deck flexing and throwing off your sensor alignment. The honest caveat: at around $79 it costs more than a chassis plus a board plus a full sensor kit, and it’s overkill if your robot lives on a hardwood floor. Buy it if you already know you want an outdoor rover.
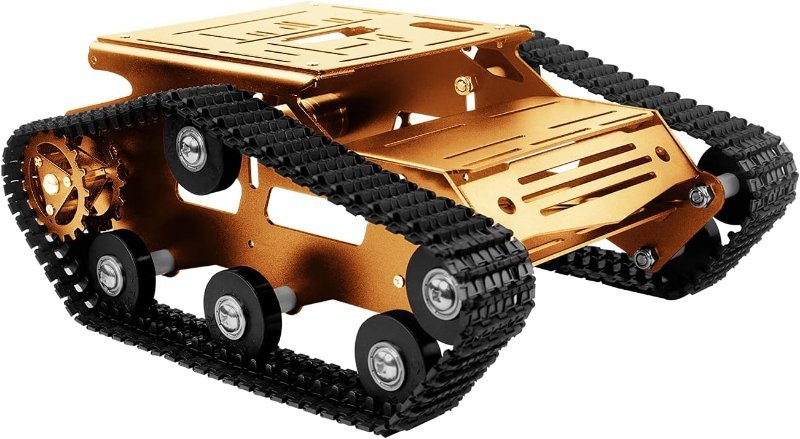
Aluminum frame, engineering-plastic tracks, and enough mounting holes for a Pi-class board. For robots that go outside.
Check Price on Amazon →Two things to buy at the same time
None of these chassis include a motor driver, and none of them should be powered off your Arduino’s 5V pin. A TT motor pulls roughly 70 mA lightly loaded but spikes far higher at stall — enough to brown out a board and reset it mid-drive. You need a dedicated H-bridge between the board and the motors; if that phrase is new, we walked through exactly why in How Motor Drivers Actually Work.
Second: the included 4×AA battery box is fine for a first afternoon and bad for everything after. Alkaline AAs sag under motor load, and a sagging supply makes your robot behave differently at minute ten than at minute one — which will send you debugging code that was never broken. Budget for a rechargeable pack early.
The bottom line
Buy the 4WD PCB-deck kit unless you have a specific reason not to. The reasons that count: you want to learn encoder-based motor control cheaply (take the 2WD kit with encoder discs), or you already know your robot is going outside (take the tracked aluminum chassis). What you should not do is buy the cheapest acrylic car because it’s the cheapest, discover in week three that there’s nowhere left to mount anything, and buy a second chassis anyway. The deck is the one part of the robot you can’t refactor in software.