Most “smart plant” projects people post are actually watering systems — pump, relay, silicone tubing, and a fair chance of a soaked windowsill the first time the code hangs. Build the monitor first. It solves the identical sensing problem without the plumbing, it starts telling you something useful within a week, and it is the honest first half of a watering rig anyway. If your sensor readings are not trustworthy, automating a pump on top of them just means you flood the plant on a schedule.
Here is the whole build, in the order the decisions actually matter.
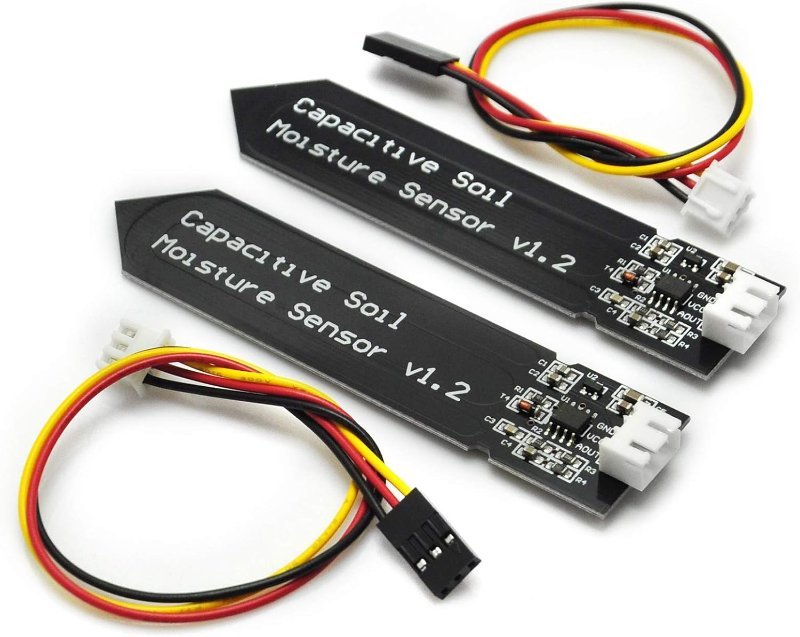
Buy a capacitive sensor. Not the fork-looking one in your kit.
The two-pronged sensor bundled into most starter kits is resistive. It pushes DC current through the soil between two exposed metal electrodes and measures how much resistance the soil offers. That current does exactly what current through a wet ionic solution does: it electrolyzes the electrodes. In continuously damp, fertilized soil, resistive probes typically corrode into uselessness in four to twelve weeks — and worse, the calibration drift starts long before the probe looks visibly bad. You get weeks of quietly wrong numbers before you get an obvious failure.
A capacitive sensor sidesteps the entire problem. Its sensing electrodes are buried under the board’s solder mask and never touch soil at all. Instead of pushing current through the dirt, an onboard oscillator measures how the surrounding medium changes the board’s capacitance — water has a dramatically higher dielectric constant than dry soil or air, so wetter soil shifts the reading. No current path through the soil means no electrolysis and no oxidation, and as a bonus it tracks actual water content better than a resistance measurement ever did.
This post contains affiliate links. If you buy through them, this site earns a commission at no extra cost to you.
Three pins, analog output, runs anywhere from 3.3V to 5.5V. Get the two-pack — the second one is your control. Sticking an identical sensor in a pot you know is well watered is the fastest way to tell “my plant is dry” apart from “my sensor is drifting.”
Check Price on Amazon →digitalWrite(pin, HIGH) to make noise, no tone generation required. The useful trick is to add a “quiet hours” check on millis() so it does not chirp at 3am. That one constraint turns a sensor demo into something you will actually leave plugged in.
Wiring it, and the 3.3V trap nobody mentions
Three wires. VCC to your board’s 5V (or 3.3V), GND to GND, AOUT to an analog input — A0 is fine. On an Uno, analogRead(A0) runs the signal through a 10-bit analog-to-digital converter, meaning the 0–5V input range gets reported back as a whole number from 0 to 1023. The sensor’s own output swings roughly between 1.2V and 3V, so expect your readings to live in a band well inside that range rather than using the full scale.
Counterintuitively, higher numbers mean drier soil. Wet soil pulls the voltage down. Getting this backwards is the single most common reason a first plant monitor reports a swamp when the pot is bone dry.
Now the trap. The oscillator on these boards is usually a 555 timer, and many of the v1.2 clones ship with a plain NE555, which is specified for a minimum supply of 4.5V. Boards intended for 3.3V systems drop the supply to 3.3V through an onboard regulator — below spec for that chip. It usually still oscillates, which is why the problem hides: you get readings, they are just less stable and less linear than they should be. Boards using a TL555C instead are rated for 3.3V operation and behave properly there. Some clones also skip the regulator entirely and bridge two of its pads with a resistor, so the sensor sees whatever you feed VCC. If you are running an ESP32 or another 3.3V board, this is worth checking before you blame your code — and if the whole 5V-versus-3.3V question is fuzzy, we covered it separately in 5V vs. 3.3V Logic Levels, Explained.
Calibration is not a step. It is the project.
A raw number between 0 and 1023 means nothing until you have two reference points. Hold the sensor in dry air and record the reading — that is your air value, the driest thing it will ever see. Then submerge it in water up to the marked waterproof line and no further and record that — your water value. Everything your plant does happens between those two numbers, and both are specific to your individual board. Do not copy someone else’s.
const int SOIL_PIN   = A0;
const int SOIL_POWER = 7;

// Replace these two with YOUR sensor's numbers.
const int AIR_VALUE   = 590;  // reading in dry air
const int WATER_VALUE = 280;  // reading submerged to the line

void setup() {
  Serial.begin(9600);
  pinMode(SOIL_POWER, OUTPUT);
}

void loop() {
  digitalWrite(SOIL_POWER, HIGH);   // power the sensor only to read it
  delay(10);                        // let the oscillator settle
  int raw = analogRead(SOIL_PIN);
  digitalWrite(SOIL_POWER, LOW);

  int pct = map(raw, AIR_VALUE, WATER_VALUE, 0, 100);
  pct = constrain(pct, 0, 100);

  Serial.print(raw);
  Serial.print(F("  =>  "));
  Serial.print(pct);
  Serial.println(F("%"));

  delay(2000);
}
map() rescales the raw reading into 0–100, and constrain() clamps it so a reading slightly outside your calibration range does not report 104% or negative moisture. Note the argument order — air value first, water value second — which is what flips the scale so bigger percentages mean wetter.
Resist the urge to chase an accurate absolute percentage. Ambient temperature, the salinity of the water (fertilizer changes this a lot), soil density and granularity, and how deep the probe sits all shift the reading. What you want is reproducibility, not laboratory accuracy: push the sensor to the same depth every time, ideally marking the shaft with a Sharpie, and then care about how today’s number compares to last Tuesday’s rather than what it claims in absolute terms.
One soil number lies. Add air temperature and humidity.
The same soil moisture reading means very different things in a 68°F room at 65% relative humidity in July and in a 72°F room at 30% humidity with the furnace running in January. In dry winter air the pot loses water far faster, so a reading that was comfortable in summer is already trouble. Logging air conditions alongside soil turns a single ambiguous number into a rate of drying, which is the thing that actually predicts when you need to water.
The DHT22 (also sold as the AM2302) is the right sensor here. It covers −40 to 80°C and 0–100% relative humidity, typically within about ±0.5°C, and it talks over a single-wire digital protocol — one digital pin, no analog input consumed. Its one real quirk is speed: it will only give you a fresh reading about once every two seconds, so do not poll it in a tight loop and then wonder why it returns nan. For a plant monitor, once a minute is plenty.
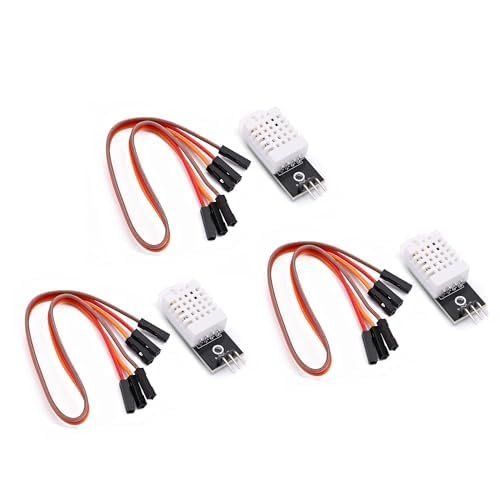
Get the breakout module rather than the bare sensor — the pull-up resistor is already on the board, which removes the most common wiring mistake. Runs on 3.3V or 5V, works with Adafruit’s DHT sensor library in about four lines of code.
Check Price on Amazon →Get the numbers off the USB cable
A monitor tethered to the Serial Monitor is a demo, not a monitor. The cheapest fix is a small OLED screen. The 0.96-inch SSD1306 modules talk over I2C — a two-wire bus where every device shares the same SDA (data) and SCL (clock) lines and is addressed by a number, so you can hang the display and future sensors off the same two pins. On an Uno, those are A4 and A5; the display’s address is almost always 0x3C. Importantly, the display living on A4/A5 leaves A0 free for your soil sensor, so nothing here fights for pins.
Drive it with the Adafruit SSD1306 library plus Adafruit GFX. Put moisture percentage in large text, temperature and humidity in small text underneath, and you have something you can glance at from across the room — which is the entire point of building this instead of buying a $12 dial-gauge moisture meter.
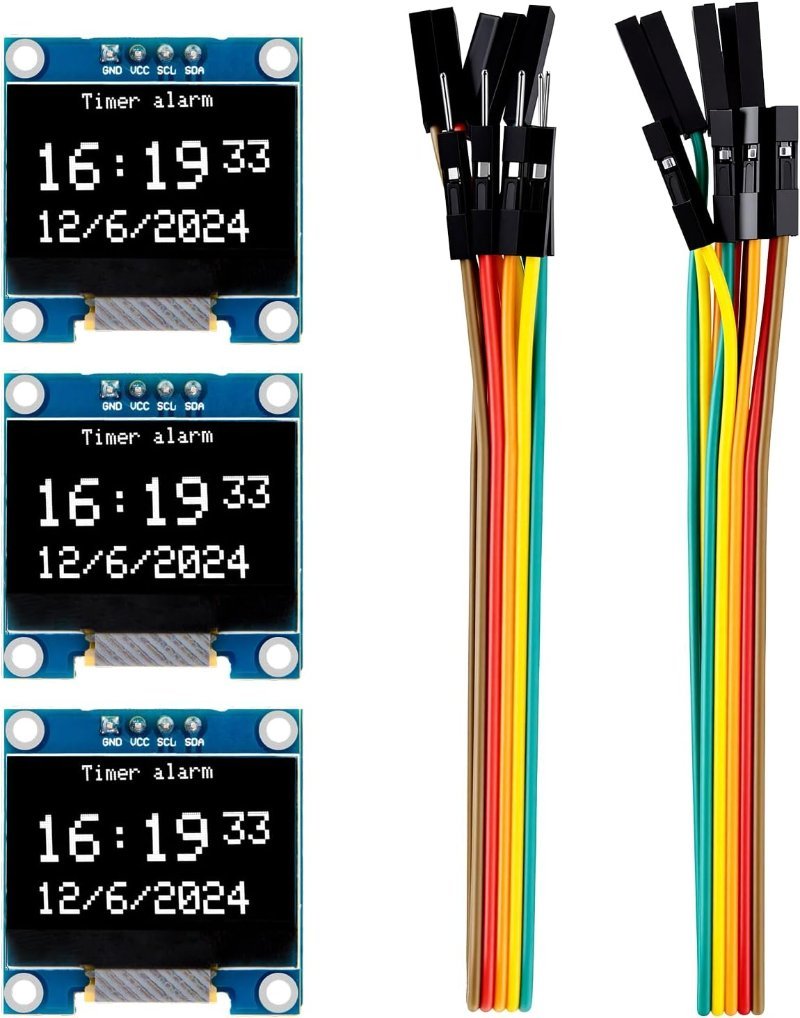
128×64 pixels, self-luminous so it is readable in a dim corner, and it runs on either 3.3V or 5V. Four pins total. These end up in every project you build afterward, which is why the three-pack is the sane buy.
Check Price on Amazon →Making it survive past the first month
Capacitive sensors do not corrode, but they are still bare fiberglass PCBs living in wet dirt, and that is a slow war. Two rules keep them honest. First, everything above the printed waterproof line stays dry — a short piece of heat-shrink over the header end, or a smear of clear epoxy, handles the exposed pads where the wires land. Second, if you conformal-coat the sensing area, coat it thin. A thick coating physically increases the distance between the electrodes and the soil, which flattens the sensor’s sensitivity; makers who went heavy on the coating found they had traded a corroding sensor for an insensitive one. Even done well, moisture eventually permeates the FR4 substrate and shifts calibration, so plan on re-running the air/water calibration every couple of months rather than assuming it holds forever.
The other longevity trick is already in the code above: power the sensor from a digital pin rather than the 5V rail, and only bring it high for the ten milliseconds you need to take a reading. The sensor spends 99.9% of its life unpowered. On a battery build this is the difference between days and months of runtime, and it reduces the total time the board sits energized in a humid environment.
What you actually get out of it
Two weeks of readings will tell you something no watering schedule can: the actual shape of your pot’s drying curve. Most houseplants drop fast for a couple of days after watering, then flatten out into a long slow decline — and the point where that curve steepens again is your real “water me” threshold, not some percentage you picked off a forum. Find that number for your plant, in your pot, in your house.
Once you trust that threshold, adding a pump is a small, boring step. Doing it in the other order is how people end up with a wet floor.